

- Another Cook's Quest
- Freeing the Mountain Dwarf
- Freeing the Goblin Generals
- Freeing Pirate Pete
- Freeing the Lumbridge Guide
- Freeing Evil Dave
- Freeing Skrach Uglogwee
- Freeing Sir Amik Varze
- Freeing King Awowogei
- Defeating the Culinaromancer
- Barrows Gloves
- Recipe for Disaster OSRS Guide FAQs
- Conclusion
The 100th quest released by Jagex, Recipe for Disaster, is arguably the single most iconic quest in Runescape. Well-known for its reward and the journey, completing Recipe for Disaster is a significant milestone in the journey of an OSRS player.
Recipe for Disaster also stands out as a quest you can progress through incrementally rather than in one go. Recipe of Disaster is ten parts and has eight sub-quests you must complete before the grand finale.
I find it more enjoyable to do in one go, but there are benefits to taking on the sub-quests one at a time. Either way, you’re in for a long ride.
Another Cook’s Quest
Requirements
- Level 10 Cooking
- The Cook’s Assistant
- rotten tomato
- eye of newt
- Greenman’s ale
- ashes
- fruit blast
Recommendations
- Fast travel to Ardougne (If you’re an Iron Man)
More Assistance for the Cook
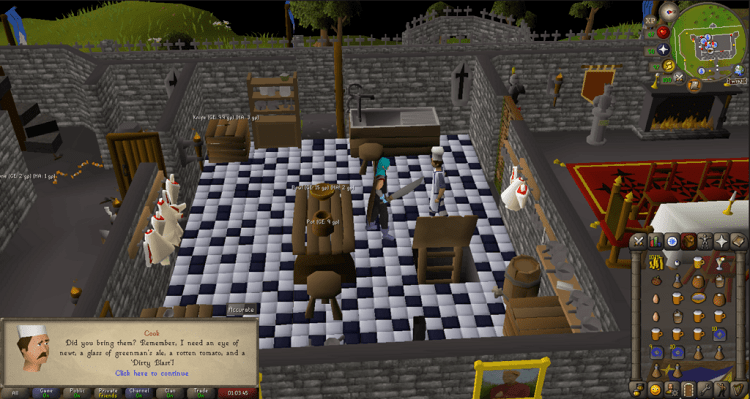
To begin, speak with the Cook in Lumbridge Castle. He needs some help getting ingredients to prepare a special dish for an upcoming feast. He needs you to get him a rotten tomato, an eye of newt, a glass of Greenman’s ale, some ashes, and a fruit blast.
Standard accounts can easily purchase all items off the Grand Exchange. If you’re an Iron Man account, there’s some leg work.
You can buy eyes of newt from the Magic shop in Port Sarim or any Herblore shop. You can purchase rotten tomatoes from crates near pillories (The closest being the one in Varrock). Start a fire and let it burn out to get some ashes.
For Greenman’s ale, you can grab a glass from Rasolo near the Fishing Guild, from the Dragon Inn in Yanille, or Jossik in the lighthouse after Horror from the Deep.
The trickiest item is the fruit blast. To make one yourself, you need a cocktail shaker, cocktail glass, lemon, orange, and pineapple.
Make your way to the Grand Tree. Spirit trees and gnome gliders are the easiest ways of getting there. These require the completion of Tree Gnome Village and Gnome Stronghold to use.
You’ll need these done for 100% Recipe for Disaster completion anyway. Alternatively, if you’ve completed Enlightened Journey, there’s a nearby balloon drop zone that you can use.
Once in the Grand Tree, find Heckel Funch. You can purchase all the ingredients for a fruit blast from him. Use a knife on the lemon to make lemon slices, then use the Mix-cocktail option on your cocktail shaker.
Use the ashes on the fruit blast to make a dirty blast. After you get everything, head back to the Lumbridge Cook and give him his requested items.
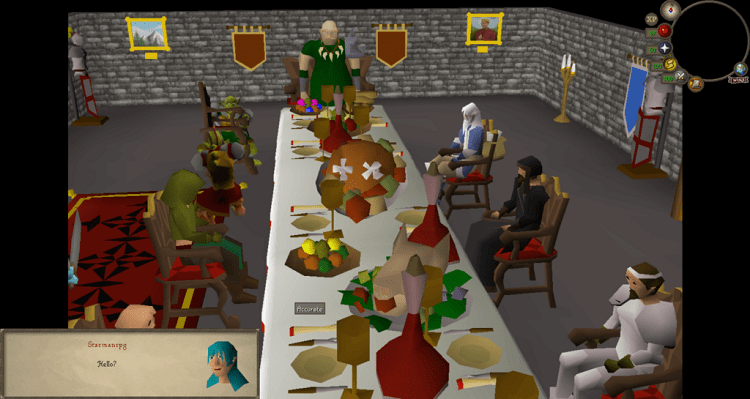
Watch the cutscene to see a gathering of Lumbridge’s Secret Council, which consists of various important leaders and figureheads around Gielinor. And Evil Dave.
Duke Horacio and Osman will get random events and leave the feast. Suddenly, a man named the Culinaromancer will appear and attack the Secret Council with Magic.
Another Secret Council member, Aris, arrives late to the party and stops the Culinaromancer’s attack with Magic of her own. Her spell freezes the time inside the dining room for everyone except you and her.
It turns out that the Lumbridge Cook accidentally released the Culinaromancer with powerful food-magic. And you helped him. So now it’s on you to save all the Secret Council members and defeat the Culinaromancer before the caused temporal paradox destroys all reality.
Inspect any of the Secret Council members to get started.
Rewards
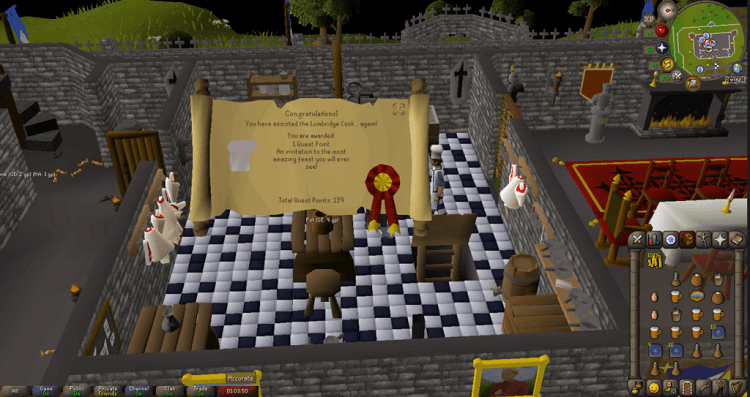
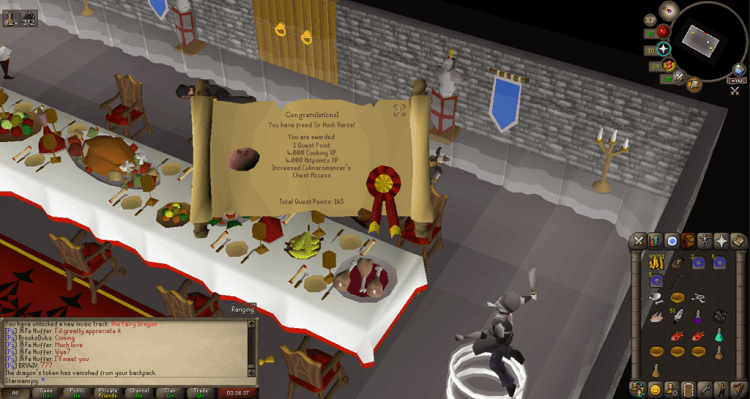
The quest rewards for Another Cook’s Quest are 1 Quest Point and initial access to the Culinaromancer’s Chest.
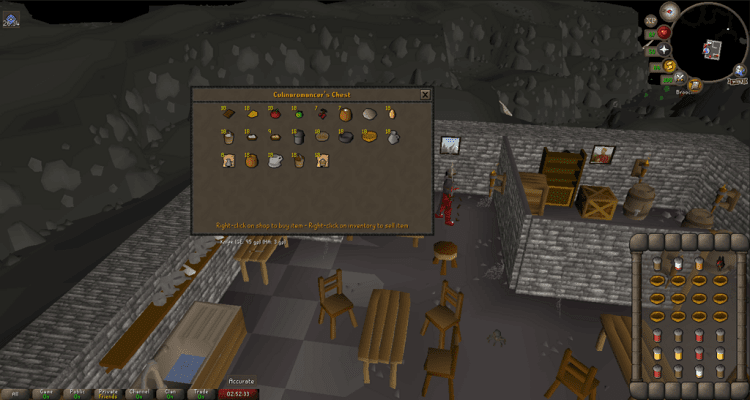
The Culinaromancer’s Chest is a valuable tool you should unlock immediately. The Culinaromancer’s Chest functions as a bank chest and is significantly close to the range than the bank on the top floor. That makes this one of the best places to train your Cooking early on.

The Culinaromancer’s Chest is also a food and item store. The food store stocks various Cooking supplies that are incredibly valuable to Iron Men. The item shop sells the exclusive Recipe for Disaster gloves. As you complete more sub-quests, the food store will have more stock, and the item shop will sell better gloves.
Freeing the Mountain Dwarf
Requirements
- The Fishing Contest
- Ice gloves or ability to kill an icefiend + any other gloves
- 316 coins
- egg
- bucket of milk
- pot of flour
- bowl of water
- 2-4 Asgarnian ale
Recommended
- Falador teleport
Between a Rock and a Hard Cake
Inspect the dwarf to learn he has a fondness for rock cakes. Aris suggests you speak with the dwarf’s father under White Wolf Mountain.
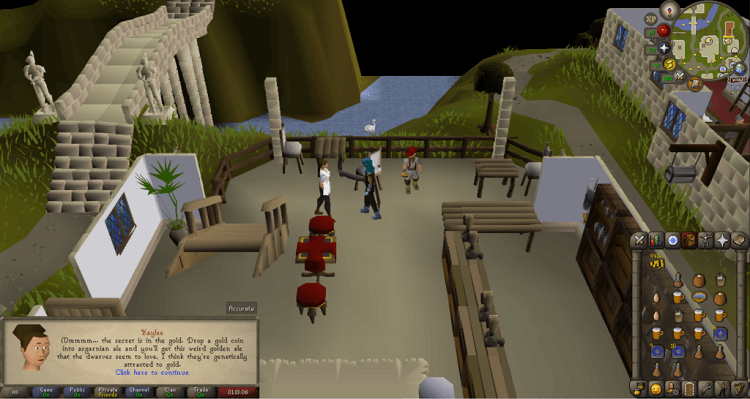
Before you do that, grab all your supplies except for the ale. Head for the Rising Sun Inn in Falador and speak with one of the barmaids about dwarves and ale. She’ll tell you that dwarves like their ale with gold.
The barmaid will offer to sell you a secret recipe for 200 coins. Get the recipe, and purchase 4-6 glasses of Asgarnian ale from her. Add a gold coin to each to make Asgoldian ale.
Head for the tunnel beneath White Wolf Mountain and go inside the bar. Speak with the old dwarf Rohak, the council dwarf’s father. Ask him about the rock cake, but he will refuse to make one for you. He will, however, reveal his weakness for ale from Rising Sun Inn.
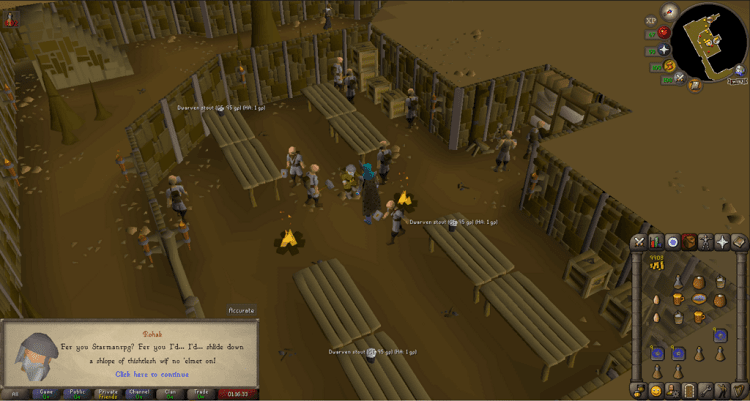
Start feeding the old dwarf glasses of Asgoldian ale to get him drunk, then speak to him about the rock cake again. While intoxicated, he will agree to make you a Dwarven rock cake for 100 coins. Give him the coins and ingredients, and he will place the cake on a nearby table.
The rock cake will damage you unless wearing gloves or ice gloves. The cake needs to cool down before you can give it to the council dwarf. Ice gloves cool it immediately. Otherwise, you can leave it in your bank for several hours or kill an icefiend with it in your inventory.
Head back to the Lumbridge dining room and use the rock cake on the dwarf to save him.
Rewards
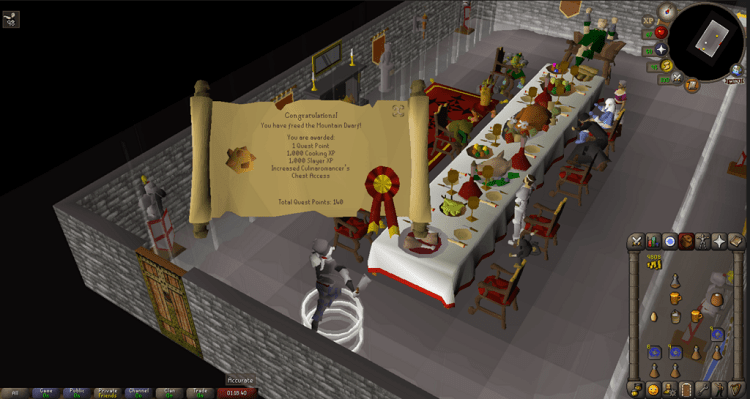
The rewards for freeing the mountain dwarf as 1 Quest Point, 1,000 Cooking EXP, 1,000 Slayer EXP, increased access to Culinaromancer’s Chest, and the ability to get more rock cakes from Rohak.
Freeing the Goblin Generals
Requirements
- Goblin Diplomacy
- Bread
- Orange slices
- Knife
- Blue, Green, or Purple dye
- Spice or gnome spice
- Fishing bait
- Bucket of water
- Charcoal or ground charcoal
Recommendations
- Taverley or Falador teleport
Cuisine of Compromise
If you remember the events of the Goblin Diplomacy quest, the Goblin village leaders don’t agree much. Aris suggests asking someone in Goblin Village what to do.
Head for Goblin Village northeast of Taverley and down the ladder in the eastern building. Below will be a goblin cook called Mudknuckles. Ask him for a suggestion on what to feed the goblin generals, and he will first ask for some charcoal for a recipe.
Charcoal can be annoying to get if you’re an Iron Man unless you clear some quests. You can get some from a Specimen tray from The Dig Site or buy it from the General Store in Shilo Village.
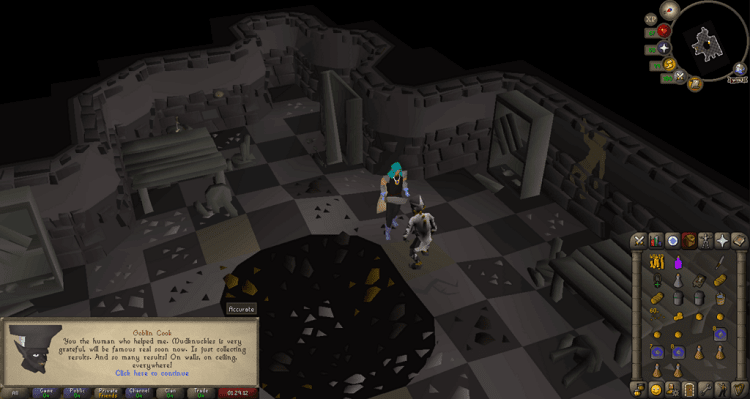
Give Mudknuckles his charcoal and watch a cutscene of his recipe having explosive results. Out of gratitude, he will offer to help you. He needs oranges that aren’t orange, maggots that aren’t bland, and bread that isn’t crunchy.
Use your blue, green, or purple dye on an orange, then use a knife to create orange slices. Use your spice or gnome spice on some fishing bait to make spicy bait and your bucket of water on bread to make soggy bread. Give all the items to Mudknuckles, and he will give you a bowl of slop of compromise in return.
Head back to the dining room and use the slop on the goblin generals to save them.
Rewards

Your rewards for freeing the goblin generals are 1 Quest Point, 1,000 Farming EXP, 1,000 Cooking EXP, 1,000 Crafting EXP, and increased access to the Culinaromancer’s Chest.
Freeing Pirate Pete
Requirements
- Level 31 Cooking
- raw cod
- pestle and mortar
- bread
- knife
- fishbowl
- needle
- three bronze wire
- Weapons and to kill level 30/31 mudskippers and level 21/23 crabs
Recommendations
- Fast travel to Port Khazard
A Dish Best Served Fishy
Inspect Pirate Pete, and Aris lets you know old Pete has a fondness for fishcakes. She tells you to ask the Cook for help since she’s no cook.
Ask the Cook how to make fishcake, and he’ll need a moment to find the recipe. Speak with him again, and he’ll tell you the ingredients: ground cod, breadcrumbs, ground kelp, and ground giant crab meat.
Exhaust ALL dialogue options with the Cook on how to obtain these ingredients. If you don’t, you won’t actually be able to make them. Use your pestle and mortar on the cod to get ground cod and your knife on some bread for breadcrumbs. Have several of each ingredient just in case you mess up. Now head for Port Khazard.
Speak with Murphy and ask for help getting the kelp and crab meat. He’ll get you outfitted with diving apparatus if you give him a fish bowl. If you’re an Iron Man, you need level 42 Crafting to make one from molten glass.
Once you have the diving apparatus, get your needle, bronze wire, weapons, armor, and food and speak with Murphy again. Your weight needs to be below 27 KG to take a dive. Keep around ten inventory spots open.
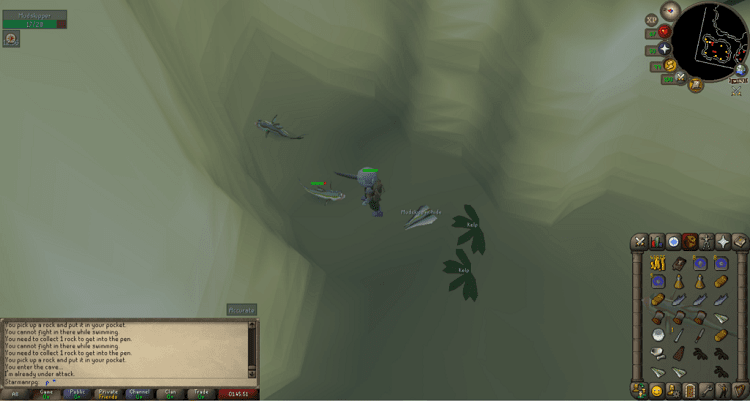
After diving below, find a tall plant and pick some kelp (Get several). Head north and speak with Nung. He wants you to get him five mudskipper hides for the crab meat. Head for the nearby alcove, pick up five rocks and go inside. The mudskippers are pretty easy to kill.
Give the hides to Nung, who wants a needle and three bronze wires. If you’re an Iron Man, make the wire with a bronze bar with level 4 Smithing. Nung is very pleased and will let you kill as many crabs as you want.
Kill some crabs for their meat, return to Murphy’s ship and head back to Lumbridge’s kitchen. Use the ingredients on each other, then cook it on the range to get a fishcake.
Right-click and use the fishcake on Pirate Pete to save him.
Rewards
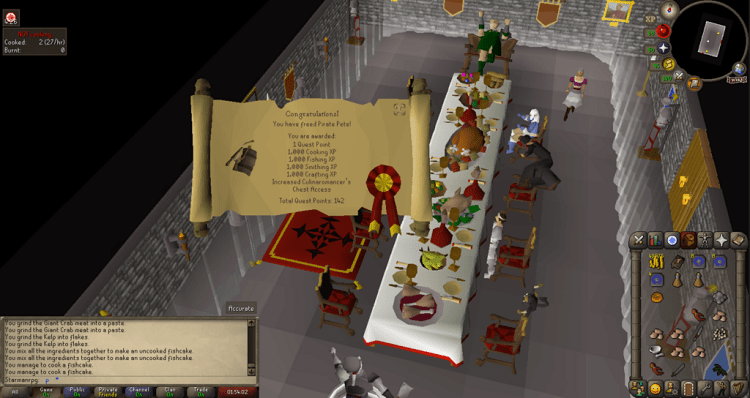
Your primary rewards for freeing Pirate Pete are 1 Quest Point, 1,000 Cooking EXP, 1,000 Fishing EXP, 1,000 Smithing EXP, 1,000 Crafting EXP, and increased access to the Culinaromancer’s Chest.
You’ll also be able to fight crabs, cook their meat, and craft crab helmets and crab claws from fresh crab claws.
Freeing the Lumbridge Guide
Requirements
- Level 40 Cooking
- Big Chompy Bird Hunting
- Biohazard
- Plague City
- Demon Slayer
- Murder Mystery
- Nature Spirit
- The Restless Ghost
- Priest in Peril
- Witch’s House
Recommendations
- bucket of milk
- egg
- pot of flour
- cake tin
- Fast-travel to Wizards’ Tower (Necklace of Passage)
The Gift that keeps on Guiding
Inspect the Lumbridge Guide, and Aris suggests giving him a Cake of Guidance. The wizards in Draynor Village are more enlightened than anyone. They should be able to help.
Head for Wizards’ Tower and speak with Wizard Traiborn about the Cake of Guidance. He will make you the cake. But first, you need to enchant the ingredients.
Traiborn will quiz you on various elements of Runescape. The egg quiz will show you NPCs from prerequisite quests, and you must correctly identify them. The milk quiz will ask you things like combat levels of monsters and the names of locations.
The flour quiz is a memory test. Traiborn will show you a batch of items and then ask a question about said items.
These quizzes are random and different for everyone. Consult the guide on OSRS Wiki to get all the answers right.
After enchanting all the ingredients, use them on a cake tin and cook the Cake of Guidance on a range. Use the Cake of Guidance on the Lumbridge Guide to free him.
Rewards
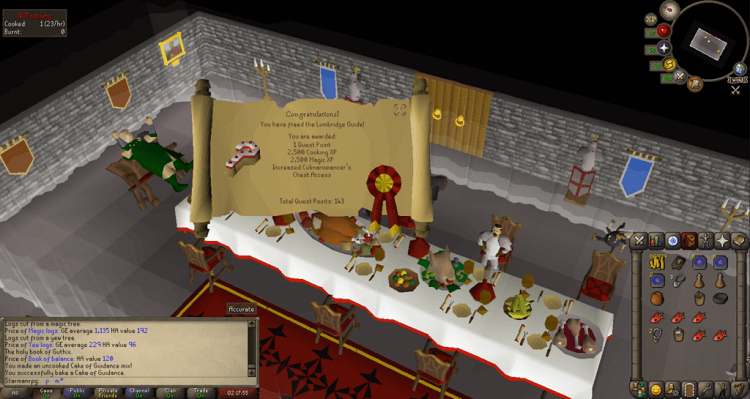
Your rewards for freeing the Lumbridge Guide are 1 Quest Point, 2,500 Cooking EXP, 2,500 Magic EXP, and increased access to the Culinaromancer’s Chest.
Freeing Evil Dave
Requirements
- Gertrude’s Cat
- Shadow of the Storm
- The Golem
- Demon Slayer
- 25 Cooking
- A cat
- 10-12 stew
Recommendations
- Ratcatchers
- Wily cat
- Fast-travel to Edgeville
The Evilest Stew
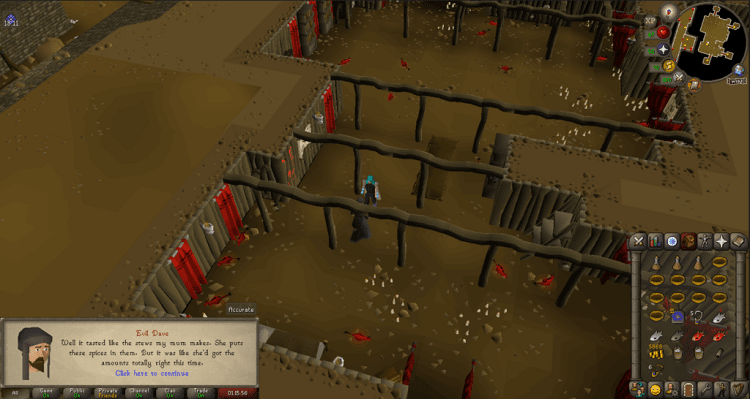
Inspect Dave, and Aris will tell you Evil Dave needs a seasoned stew made in a special way. Ask who could help you with that, and Aris recommends Dave himself. As in the Dave existing outside of this dining room.
The versions of the council members not in the time bubble already went through this, so the other Dave should know what we fed him. He lives in his mom’s basement in Edgeville.
Head for the house west of Edgeville bank and speak with Dave in the basement. Ask him about the stew and tell him the Magic requires it. Dave will tell you that you fed him a perfectly spicy evil stew like the one his mom makes. Go upstairs and speak with his mom, who will tell you that Dave’s hellrats stole all her spices.
Go back downstairs with your cat and stew, and use your feline friend to hunt and kill some hellrats. Make sure you have at least a standard fully-grown cat. Kittens have awful catch rates and aren’t worth using. Wily cats after Ratcatchers have the best catching rates at 70%.
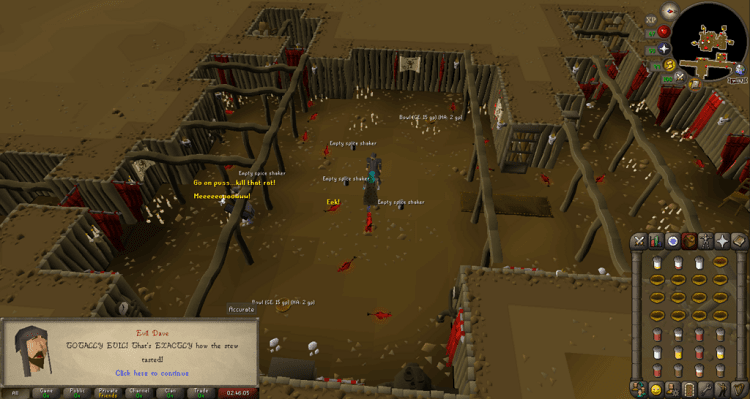
Each catch will net you a brown, orange, red, or yellow spice with 1-4 doses. To figure out what stew you gave Dave, experiment with spice doses, then USE the spicy stew on Dave.
The perfect stew has at least one dose of every spice and a maximum of three doses per spice. Figure out one spice at a time by increasing the dosage until you get it right. When Dave tells you one of the spices is correct, but the rest are wrong, it means you have the correct dosage.
Do this for all four spices. Once you have the formula right, Dave will exclaim that it’s totally evil. Take the wicked stew back to Dave in the dining room and use it on him to save him.
Rewards
Your primary rewards for freeing Evil Dave are 1 Quest Point, 7,000 Cooking EXP, and increased access to the Culinaromancer’s Chest. You’ll also be able to make spicy stew and own hellcats.
Freeing Skrach Uglogwee
Requirements
- Big Chompy Bird Hunting
- 41 Cooking
- 20 Firemaking
- axe
- raw chompy
- iron spit
- logs
- pickaxe
- tinderbox
- ball of wool
- ogre bow
- ogre arrows
- ogre bellows
Recommended
- Tai Bwo Wannai Trio
- Tai Bwo Wannai teleport or fast-travel to Brimhaven
- Fairy Rings
- Fast-travel to Feldip Hills
- Weight-reduction clothing & stamina/super energy potions
The Great Jubbly Bird
Skrach the ogre loves chompy birds. And the jubbly bird is the best-tasting chompy of them all.
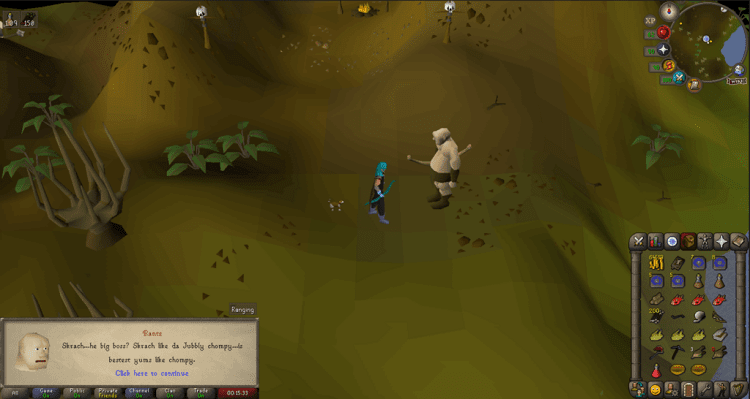
Pay Rantz a visit in Feldip Hills and ask him about the jubbly bird. He’ll help you, but first, he wants you to help him with something in Karamja. Rantz tells you to go over to the water to the southeast.
Head there to meet up with Rantz’s shadow clone. He wants a way to Karamja. Slowly explain to him the concept of a boat, and he’ll kick down a nearby tree. Use the axe you brought on the downed tree twice to make Rantz his boat.
Rantz will shoot an arrow into a tree all the way in Tai Bwo Wannai. You need to go over there and find it. He also tells you to cook a chompy there for good luck.
The tree is slightly northwest of Tai Bwo Wannai. Once you find the tree with the arrow, cook a chompy using your iron spit and logs. A cutscene will ensue of Rantz’s children making interesting use of Rantz’s boat. That’s what I call using your head. Rantz offers you a ride back via the boat. Accept and speak with Rantz again.
Rantz will tell you that you need a balloon toad to catch a jubbly. Head for the nearby swamp and use your ogre bellows on swamp bubbles. Then use it to catch several toads. Head back to Rantz’s cave, and up on a hill to the east is a pile of rock. Mine this rock until you get, well, a rock. Get several to be safe.
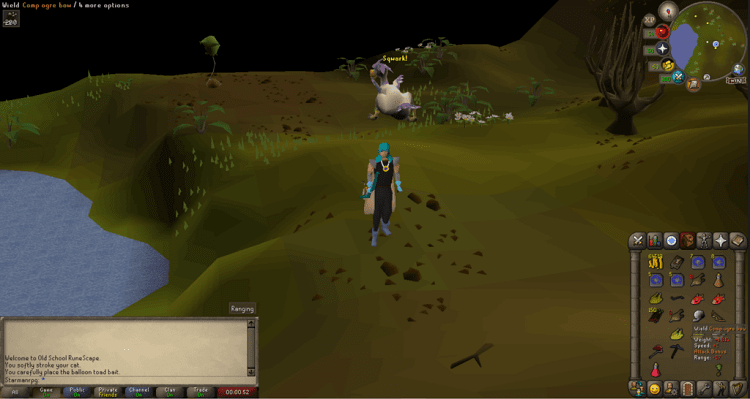
Use your ogre bellows on a toad with rocks and a ball of wool in your inventory to make a balloon toad. Drop the balloon toad in the darkened patch of dirt south of Rantz’s cave. Eventually, a jubbly, the Runescape version of a Chocobo will appear.
Once it does, whip out your ogre bow and arrows and kill it. Pluck it, take its meat, then cook it on Rantz’s ogre spit. Even with relatively high Cooking, you can burn the jubbly meat, so hope for the best.
After successfully cooking the jubbly, head back to the dining room. Carefully right-click and use it on Skrach to save him.
Rewards
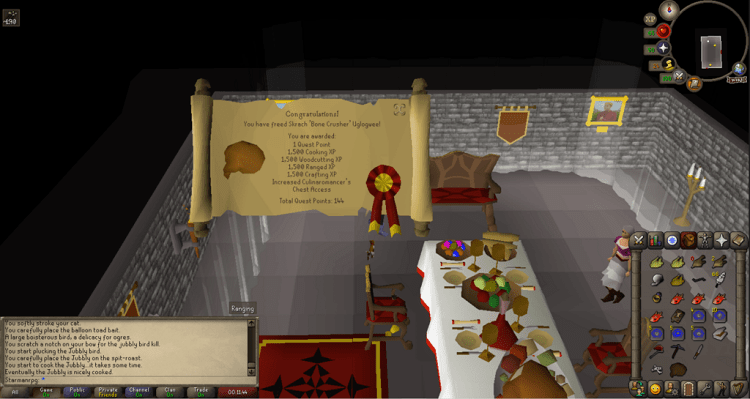
Your rewards for saving Skrach are 1 Quest Point, 1,500 Woodcutting EXP, 1,500 Cooking EXP, 1,500 Crafting EXP, 1,500 Ranged EXP, and increased access to the Culinaromancer’s Chest.
You also gain access to the boat to and from Feldip Hills and Tai Bwo Wannai in exchange for chompy birds or herbs.
Freeing Sir Amik Varze
Requirements
- 107 Quest Points
- Access to Kharazi Jungle
- Family Crest
- Heroes’ Quest
- Shield of Arrav
- Lost City
- Merlin’s Crystal
- Dragon Slayer I
- Shilo Village
- Underground Pass
- Jungle Potion
- Biohazard
- Plague City
- Waterfall Quest
- Ability to defeat level 159 or level 170 Evil Chicken
- Ability to defeat level 227 black dragon
- bucket of milk
- pot of cream
- pot of cornflour
- Evil Chicken egg
- axe*
- a machete*
- Radimus notes*
- Dramen/Lunar staff
- Dramen branch
- pestle and mortar
- raw chicken
- ice gloves
*- Only if you don’t complete Legends Quest ahead of time
Recommended
- Level 60 Combat stats
- Anti-dragon/dragonfire shield
- Antifire potion
- stamina/super energy potions
- Fast-travel to Draynor Village
The Creme Brulee Supreme
Aris will tell you that Sir Amiz Varze needs a creme brulee supreme. She knows that the egg of the Evil Chicken is one of the ingredients and suggests speaking with the Wise Old Man in Draynor Village about it.
You’ll need to ask the Lumbridge Cook for info on the other ingredients. Apparently, you used milk, cream, cornflour, cinnamon, vanilla, the egg of the Evil Chicken, and had a dragon flambé it to perfection.
The milk and cream are simple enough to get. To get cornflour, grind sweetcorn at any mill and fill a pot with it. You can get cinnamon by using a pestle and mortar on a Dramen branch. The vanilla comes from the vanilla pod plant found in the Kharazi Jungle.
Hopefully, you got Legends Quest out of the way, as that one is annoying. If not, begin Legends Quest by speaking with Radimus in the Legends Guild to get his notes.
Head south of Shilo Village with the notes, an axe, and a machete to enter the Kharazi Jungle. Vanilla pod plants are to the west by the beach.
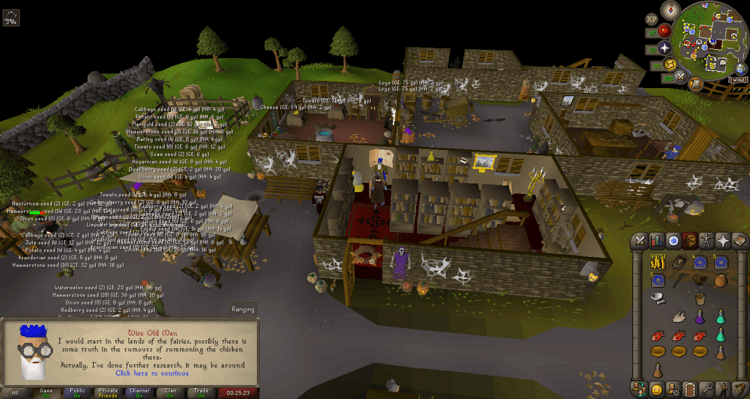
Head over to Draynor Village and speak with the Wise Old Man about strange beasts and then the Evil Chicken. He tells you there are rumors of a ritual for summoning the Evil Chicken in Zanaris.
Grab your raw chicken, Dramen/Lunar staff, and combat gear, and head for Zanaris. Next to the fairy ring as you enter Zanaris is a chicken coop. Use your raw chicken on it to enter the Evil Chicken’s dimension.

Head north past the black dragons until you find the Evil Chicken. Kill him. After he’s dead, pick up his egg. Go back to where the black dragons are and kill one of them.
There are numerous safe spots in this cavern, so as long as you have 100% dragonfire immunity, there’s little danger of death unless you’re careless. After the dragon is dead, it will drop a dragon token. Grab it and leave the Evil Chicken’s dimension.
Head back to Lumbridge kitchen and get your ice gloves on. Use your cream and milk together, then add the cornflour. Follow that up with the vanilla, Evil Chicken Egg, and cinnamon. All that’s left is to dragon fry it.

Rub the dragon token you got, and you will warp into another dimension (Only in Lumbridge or Zanaris). A fairy dragon called K’klik will appear and ask what you want. Ask him to flambé your raw Brulee.
He will do so in exchange for your dragon token. Either be wearing ice gloves or have 100% dragonfire immunity when he does this. Otherwise, you’ll likely die.
After K’klik finishes deep-frying your Brulee, you’ll warp back to your original location. Head into the dining room and use it on Varze to save him.
Rewards
Your primary rewards for saving Sir Amik Varze are 1 Quest Point, 4,000 Cooking EXP, 4,000 HP EXP, and increased access to the Culinaromancer’s Chest.
You’ll also gain access to the Evil Chicken Lair.
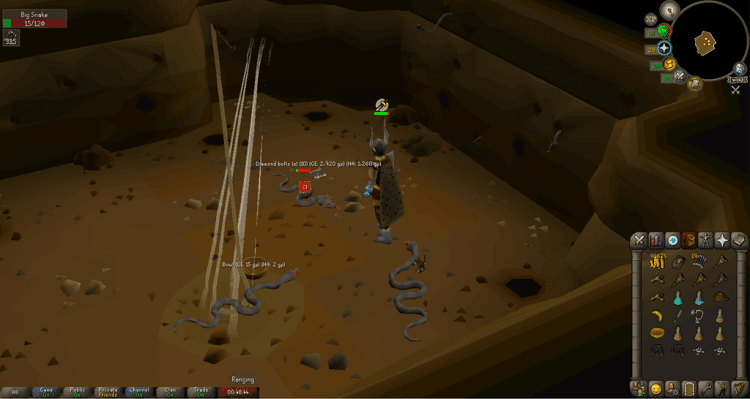
Freeing King Awowogei
Requirements
- Monkey Madness I
- The Grand Tree
- Tree Gnome Village
- M’speak amulet
- Karamjan monkey greegree
- Gorilla, Ninja monkey, and Zombie monkey greegrees
- Banana
- monkey nuts
- rope
- knife or slash weapon
- pestle and mortar
- Must defeat a big snake, Zombie monkey, Monkey guard, and Ninja monkey
Recommendations
- Level 60+ Combat stats
- stamina/super energy potions
- food
- Antipoison potion
- 3,000+ coins
- Completed Daero’s training
- Fast-travel to Tree Gnome Stronghold
The Stuffed Snake
Aris isn’t sure what Awowogei’s favorite food is. Your best bet is to ask Awowogei himself. Get that M’speak amulet.
Make your way to Ape Atoll. If you completed Daero’s training after Monkey Madness and have access to fairy rings, use code C L R to warp to the Ape Atoll Agility Course. If you’re in human form, the monkeys will put you in jail.
Put on your Karamjan greegree, pick the lock, and you’re free to go. If you haven’t done this, get to Ape Atoll via Daero and Waydar at Tree Gnome Stronghold and take Lumdo’s boat on Crash Island to Ape Atoll.
Once there, put on your greegree and head into the city. Buy several monkey talismans for Tutab, the rune salesman. Next, go into the temple and kill a Monkey Guard. Grab his bones when he dies.
Next, head outside and use Ranged or Magic to kill one of the Monkey Archers. If you stand in the tall grass, they won’t be able to shoot you. Grab the archer’s bones when he dies.
Finally, head out of the city and into the Ape Atoll Dungeon west of Lumdo’s boat. Kill one of the Zombie monkeys and collect his bones. Equip your greegree, so the enemies down here don’t attack you, and make your way to the end of the dungeon to find Zooknock.
Once you reach Zooknock, speak with him and ask him to make you some more greegrees. Use all the bones and talismans on him to receive ninja, gorilla, and zombie greegrees.
Head back to Ape Atoll and get your hands on some monkey nuts and a banana. Go to Awowogei’s palace and speak with one of the Elder Guards to be allowed inside. Speak with Awowogei, and he won’t tell you his favorite food. He will let slip that three monkeys know what it is, though.
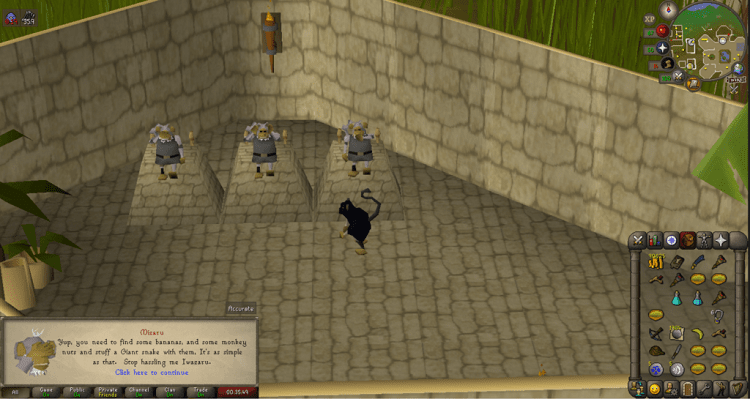
Go to the temple and look for three monkeys in the northwest room. Tell them you’re planning a surprise party for the king, and eventually, they will reveal that he likes a stuffed big snake with monkey nut paste and banana slices.
Use the banana and monkey nuts on them. They will tell you these aren’t good enough and that you need tchiki monkey nuts and a red banana. They’ll also give you directions on how to find all three ingredients.
Go back to Crash Island and search for a hole that leads to an enclosed space filled with big snakes. Kill at least one of them to get its corpse. This area is multicombat, and the snakes can poison, so use Protect from Melee and have an antipoison handy. I recommend getting 3-5 snake corpses.

Return to Ape Apoll and equip your Gorilla greegree. Head west until you see a tree with red bananas. Use your rope on the tree to pull the tree down to grab a red banana. Use the drop trick to obtain multiple bananas.

Finally, to get some tchiki monkey nuts, equip your Ninja greegree and head for the Agility Course to the southeast. Complete the Agility Course up until you see a broken down hut. A hole inside leads to a bush with tchiki monkey nuts. Use the drop trick again to get more than one set of nuts.
Use a knife on a red banana to get banana slices and a pestle and mortar on the nuts to get ground nut paste. Use both on a snake corpse to get a raw stuffed snake.
Go back to the temple with the Monkey guards and use the trapdoor in the eastern part of the temple. Head down one of the ramps and slip through the crack in the wall. Equip your Zombie greegree to walk over the hot coals safely. Use your raw stuffed snake on the oddly-shaped rock to create a cooked stuffed snake.
Return to Lumbridge and right-click and use the stuffed snake on King Awowogei to save him.
Rewards
Your rewards for freeing King Awowogei are 1 Quest Point, 10,000 Cooking EXP, 10,000 Agility EXP, an Ape Atoll Teleport spell, and increased access to the Culinaromancer’s Chest.
Defeating the Culinaromancer
Requirements
- 175 Quest Points
- Desert Treasure
- The Dig Site
- Temple of Ikov
- The Tourist Trap
- Death Plateau
- Troll Stronghold
- Priest in Peril
- Waterfall Quest
- Horror from the Deep
- Alfred Grimhand’s Barcrawl
- Ice gloves
- Restore/super restore potions
- Ability to defeat six strong enemies without Prayer
Recommendations
- Level 60+ Combat stats
- Chaos gauntlets
- Snare runes
- God books
- Dragon defender
- High-healing food
After freeing all the council members, Aris will release the spell. To his dismay, the Culinaromancer will notice all the council members are gone and his plans ruined. He will curse you and Aris before retreating to his own dimension with the promise of returning. Aris will urge you to follow him and finish him off.
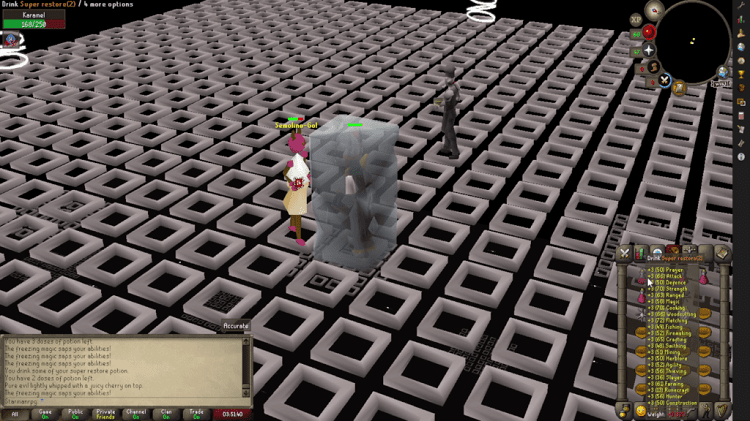
Make sure you are ready, as you have six boss fights ahead of you. If you die in the Culinaromancer’s dimension, you don’t get your lost items back. You don’t have to do them back-to-back and can freely leave whenever you want. If you leave mid-fight, the boss fight will reset.
Head inside the Culinaromancer’s dimension, and he will start summoning minions to kill you. These minions are all stronger altered versions of bosses you’ve defeated in the past. Their fights mimic the mechanics of their original fights.
Agrith-Na-Na
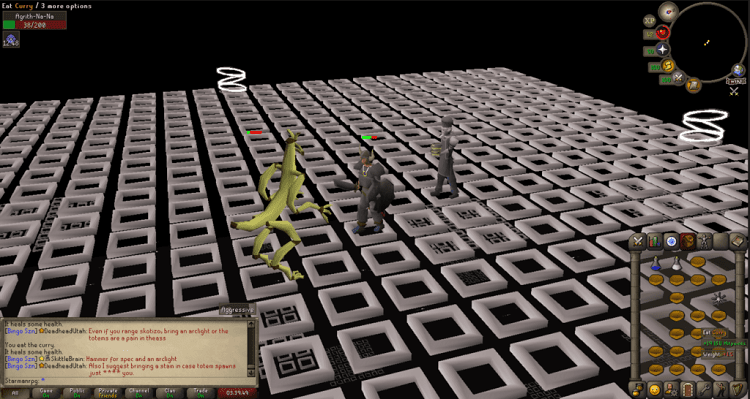
Agrith-Na-Na is Agrith Naar from Shadow of the Storm. He uses Melee up close and Fire Blast if you are far away. He hits very hard and very consistently. Bring an entire inventory of food and take him down with whatever Combat style you prefer.
Flambeed
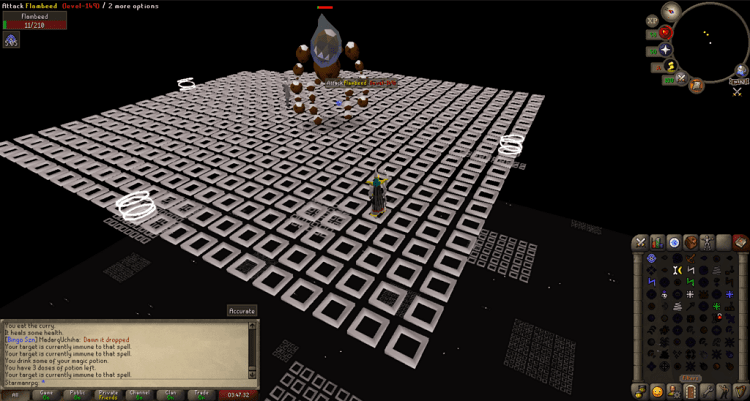
Flambeed is Farheed from Desert Treasure. If you plan on using a weapon, you must wear ice gloves. Otherwise, he will unequip it. You have to use Water spells or ice arrows on Flambeed.
An easy way of dealing with Flambeed is to bring runes for a couple of dozen casts of snare. Use snare to keep him in place, then attack with your strongest water spell. Depending on your speed, you should get in 3-5 casts before needing to use snare again. It’s a long fight, but he goes down eventually.
Karamel
Karamel is Kamil from Desert Treasure. She uses Melee up close and ice spells from a distance. She can also freeze you and will continuously drain your stats.
The best way of dealing with Karamel is to fight her up close. She will use Melee instead of ice spells and freeze you less often. She’s far less dangerous as a Melee opponent than a Magic one.
Use a Fire spell on Karamel. Fire Bolt with chaos gauntlets is an excellent choice since she will never get you below level 35 Magic so long as you periodically use restore potions.
Dessourt

Dessourt is Dessous from Desert Treasure. He has a max Melee hit of 19 and can deal constant 5s with a Magic attack. Magic and Ranged are your best options for dealing with him.
One of the best Combat hacks in Runescape is using Magic in Melee armor. Bosses typically have such poor Magic defense that your having a negative Magic bonus doesn’t matter. You’ll still hit, and your Melee armor protects you from his hard-hitting Melee attacks.
Gelatinnoth Mother
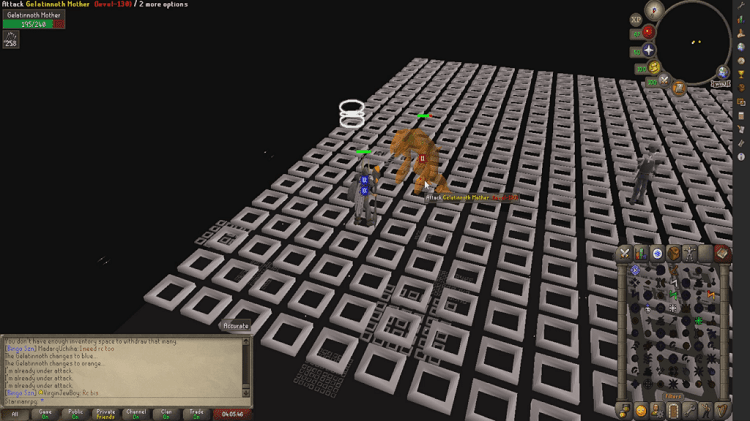
Gelatinnoth Mother is a rerun of the Daggonoth Mother fight from Horror of the Deep. Gelatinnoth Mother uses strong Ranged and Magic attacks that can stack and have a max hit of 20.
She changes color every 15-20 seconds, and you can only damage him with one kind of attack in each phase. Her phases are Air, Water, Melee, Earth, Fire, and Ranged.
Use Melee or Ranged armor with your best Magic setup to fight the Gelatinnoth Mother. For her Melee phase, I opt for bashing her with my staff than bringing a complete Melee gear switch. Phases don’t last long enough to warrant complete Melee/Ranged switches.
You can hit very hard with Ranged, so I recommend bringing your best crossbow, bolts, and a book of order. A mid-level player should get her down before she completes two rotations of her phases.
The Culinaromancer

After defeating all his minions, the Culinaromancer will decide to kill you himself and attacks you.
Despite being only level 75, The Culinarmancer hits 25s consistently with Magic. His Melee attack is weak, so get in close to get him to use Magic less.
His Magic attacks have a set chance of hitting regardless of your Magic defense, so use your offense-oriented gear instead. The Culinaromancer has 0 Defense, so any attack style works. Use your strongest to take him down.
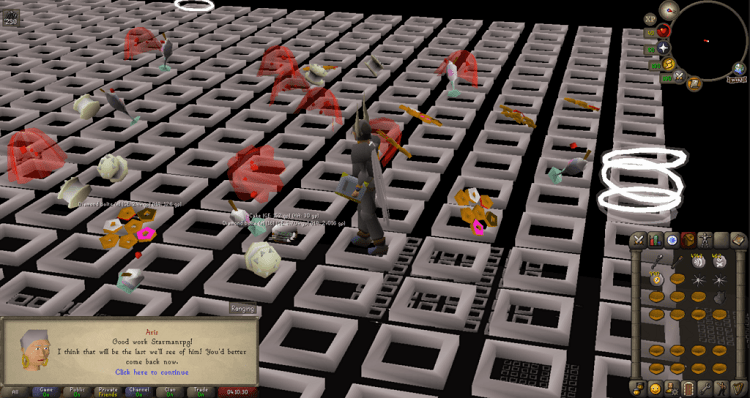
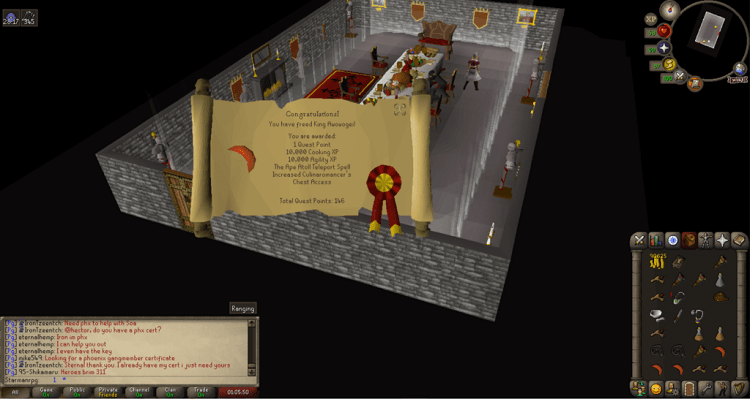
Upon defeat, the Culinaromancer takes a page out of Shao Khan’s book and explodes. Aris will congratulate you, and the quest abruptly ends.
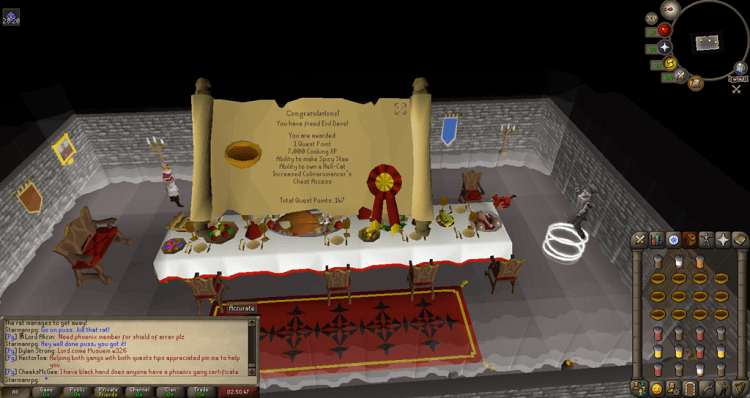
Congratulations! You have successfully finished the Recipe for Disaster!
Rewards

Your rewards for completing Recipe for Disaster are 1 Quest Point and a bankable EXP lamp that grants 20K EXP to any skill above 50. You also gain complete access to the Culinaromancer’s Chest.
Barrows Gloves
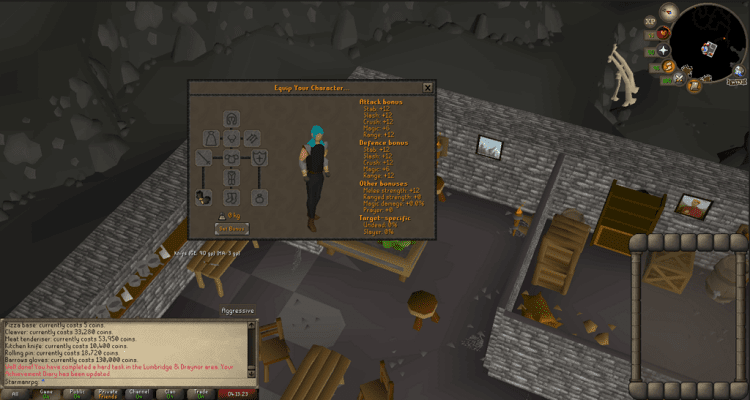
The ultimate reward for completing Recipe for Disaster is Barrows gloves. These are arguably the second-best item for your glove slot for all Combat styles.
You can purchase Barrows gloves from the Culinaromancer’s Chest for 130K GP.
Recipe for Disaster OSRS Guide FAQs
Question: Are any of the Recipe for Disaster Gloves Worth Getting Besides Barrows Gloves?
Answer: Absolutely. Every RFD glove Adamant and beyond are superior to the combat bracelet. RFD gloves are very useful for Iron Man accounts since things like combat bracelets have high Crafting requirements.
Question: Are any of the Kitchen Weaponry Useful?
Answer: Unfortunately, no. The Barrows gloves are some of the best items in the game, but kitchen weaponry is only as strong as rune weapons at best. They’re also more expensive to buy from the Culinaromancer’s Chest than from the GE.
Question: Do Recipe for Disaster Gloves have Defense Requirements?
Answer: Nope! That’s one of the best parts. They have no Defense requirements, so early clearers of Recipe for Disaster can get themselves a massive equipment upgrade.
Conclusion
Recipe for Disaster is probably my favorite quest in OSRS. I love doing it all at once in one session. It either effecively masks common problems with OSRS quests and is devoid of them.
Rewarding players with a best-in-slot item in a quest mid-level players can complete is a major W for Jagex. It sure beats paying 16 Mil GP for a tormented braceclet.
All in all, I give Recipe for Disaster a 9/10. It’s genuinely an enjoyable quest and has an incredible final reward.
- Anachronia RS3 Guide - December 9, 2022
- Recipe for Disaster OSRS Guide - November 20, 2022
- Tasks to Block OSRS Guide - November 18, 2022