

The first Master difficulty quest added to Runescape was Legends’ Quest. When it was first added to the game, it aimed to challenge the most dedicated of players in ways that no other content could at the time. However, the quest is still somewhat challenging, and its completion is the only way for players to get into the prestigious Legends’ Guild.
Key Info Up Front
Members Only: Yes
Quest Length: Long
Quest Difficulty: Master
Required Skills: Prayer Level 42, Herblore Level 45, Agility Level 50, Crafting Level 50, Smithing Level 50, Strength Level 50, Thieving Level 50, Woodcutting Level 50, Mining Level 52, Magic Level 56
Required Completed Quests: 107 Quest Points, Family Crest, Heroes’ Quest, Shilo Village, Underground Pass, Waterfall Quest
Required Items: 2x Gold Bars, 2x Law Rune, Ardrigal, Cut Gems (Diamond, Emerald, Jade, Opal, Red Topaz, Sapphire), Earth Rune, Hammer, Mind Rune, Rope, Axe (Dragon, Infernal, or Rune), Lockpick, Pickaxe, Snake Weed, Soul Rune, Unpowered Orb, Vial of Water
Legends’ Quest Overview
Legends’ Quest acts as the player’s trial to gain access to the Legends’ Guild and be recognized as one of the most capable adventurers in Gielinor. As the first Master difficulty quest added to the game, it is a tad easier than its peers but still offers a fun and challenging experience. However, it is also classified as a Long quest, meaning that you should expect to spend at least an hour completing it. If you account for gathering all the items required to complete it or training its required skills, the time to complete the quest can get much hire.
Before you start this quest, you’ll also need to follow quests like Family Crest, Waterfall Quest, Heroes’ Quest, Underground Pass, and Shilo Village. You will likely have most of those completed before turning your eye toward the Legends’ Quest, but if you don’t, you’ll have to get them out of the way first. If you also need to top out one or two of the required skills, you can find our guides for training them in OSRS here:
- Prayer Level 42
- Herblore Level 45
- Agility Level 50
- Crafting Level 50
- Smithing Level 50
- Strength Level 50
- Thieving Level 50
- Mining Level 52
- Magic Level 56
Required Items
I recommend gathering all the items needed for the quest before starting it. This will help save you from running away from the search to hunt down an item or two, adding a ton of time to the already lengthy quest. So, here are all of the items you need to get before starting Legends’ Quest.
2x Gold Bars
To get your two Gold Bars, you’ll need to have Smithing Level 40 to smelt one piece of Gold Ore per bar. The best place to mine Gold is Varrock, but you can also purchase bars from the Grand Exchange for an average price of 91 Coins.
Hammer
You will likely have a Hammer or two in your bank from training various skills. If you don’t have one, however, you can get it as a drop from multiple low-level monsters, purchase one from a General Store for two Coins, or grab one from above the Furnace in Falador.
Rope
Ropes are primarily used for completing various quests across RuneScape, so there is a good chance you won’t already have one. With the Crafting Level required for this quest, you’ll be able to make one at a Spinning Wheel out of either Yak Hair or four Balls of Wool. Otherwise, you can buy one from Trader Stan’s Trading Post for 45 Coins or grab one for free on the Fishing Platform to the east of Witchaven.
Dragon, Infernal, or Rune Axe
By the time you are ready to take on this quest, you will likely have one of these axes, but you may have lost it or sold it for some reason. If you don’t have one, the easiest to get your hands on is a Rune Axe. If money is no object, you can buy one from the Grand Exchange for around 7,268 Coins, or you can make your own with Smithing Level 86.
Lockpick
While you only technically need one Lockpick for Legends’ Quest, I recommend bringing at least two in case your first attempt fails and breaks the first one. You can purchase Lockpicks from Martin Thwait in the Rogues’ Den for 20 Coins each.
Pickaxe
Any Pickaxe will work for this quest, so feel free to bring whatever one you use for your mining or buy a cheap one if you’re afraid of losing it during the quest.
Vial of Water
Vials of Water are a common ingredient used for the Herblore skill. To get one, you’ll need to buy an Empty Vial from a General Store or Herblore shop and then use it on a water source like a Sink.
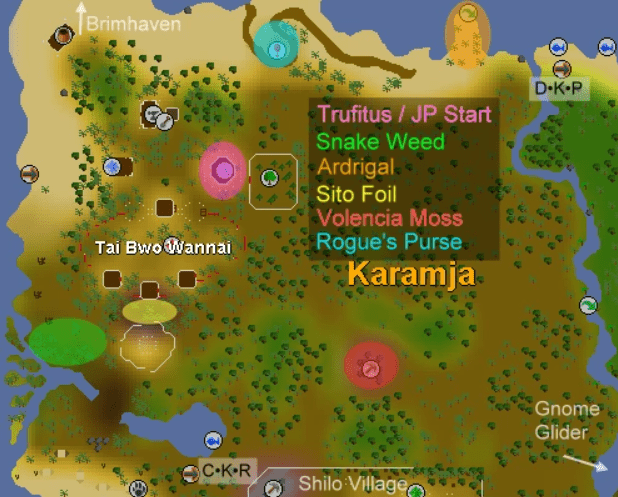
Ardrigal
To find Ardrigal, you’ll need to head to the northern peninsula on the eastern coast of the island Karamja. It is harvested from the palm trees found there in a grimy form that you will then have to clean.
Snake Weed
Snake Weed is also found on Karamja, just to the southwest of Tai Bwo Wannai. They are registered from Marshy Jungle Vines, but getting one successfully might take a few attempts.
Cut Gems
You also will need a cut version of every gem up to Diamond. This means you will need a Diamond, Emerald, Jade, Opal, Red Topaz, Ruby, and Sapphire. You may have some of these lying around still from training your Crafting, but if you don’t, I recommend buying them from the Grand Exchange. This is because there is no consistent way to get Uncut Gems, and they aren’t too expensive once they are cut. The average prices for each are below.
- Diamond: 1,729 Coins
- Emerald: 380 Coins
- Jade: 282 Coins
- Opal: 505 Coins
- Red Topaz: 2,621 Coins
- Ruby: 814 Coins
- Sapphire: 210 Coins
Soul Rune
Making your Soul Rune requires Runecraft Level 90, but don’t worry if your Runecraft isn’t that high. They, thankfully, are sold for cheap on the Grand Exchange so that you can buy one for only 151 Coins.
Mind Rune
The Mind Rune is much easier to make than a Soul Rune because it only requires Runecraft Level 2. However, they are also sold on the Grand Exchange for only 3 Coins, so you’re better off just buying one to save time.
2x Law Runes

Law Runes can be made with Runecraft 54 and only requires one Pure Essence and a Law Talisman to create one. However, if you don’t want to spend the time doing that, they aren’t too expensive on the Grand Exchange and are typically sold for around 126 Coins.
Earth Rune
Earth Runes can be made with Runecraft Level 9, but they are sold on the Grand Exchange for 5 Coins, so you’re better off buying one if you don’t have it already.
Unpowered Orb
Unpowered Orbs are made with Molten Glass with Crafting Level 46 or higher. Molten Glass is easily gotten by using Sand in a Furnace, but if you don’t want to make one, they are sold for 99 Coins on the Grand Exchange.
Walkthrough
Kicking Things Off
Required Items: None
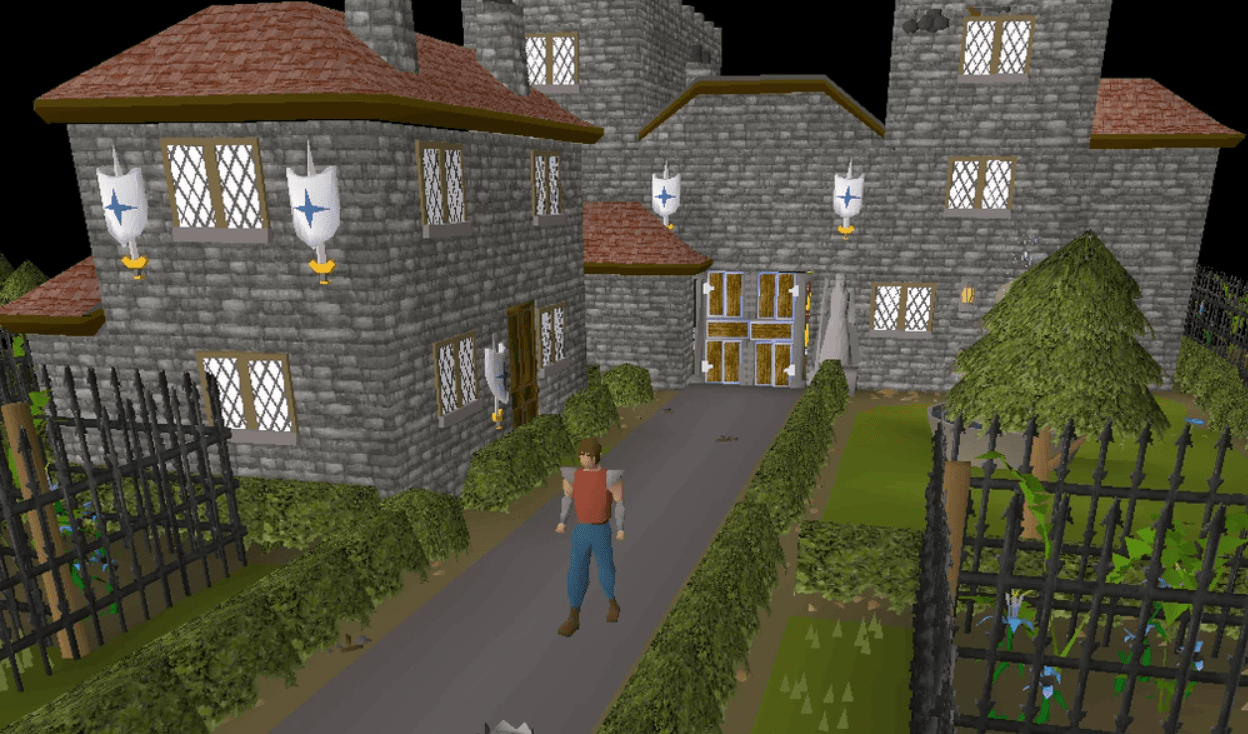
Once you have the required skills, quest completions, and items to finish Legends’ Quest, you’ll need to head to the Legends’ Guild. It can be found to the north of East Ardougne, and when you first get there, you’ll need to talk to the guards there to be let in. They will only let you in once you meet the requirements to start the quest. Once you’re in, talk to Sir Radimus Erkle to get the quest started.
Erkle will tell you that to make it into the guild, you’ll need to complete a map of the Kharazi Jungle. While you do so, he instructs you to introduce yourself to the locals there and get them to give you a gift that can be displayed within the guild. With that, you’ll be ready to start the quest. Before you leave the guild, however, make sure to grab the Papyrus off the table by Erkle and a Machete from the cupboard. You’ll need these later on, and they are accessible here.
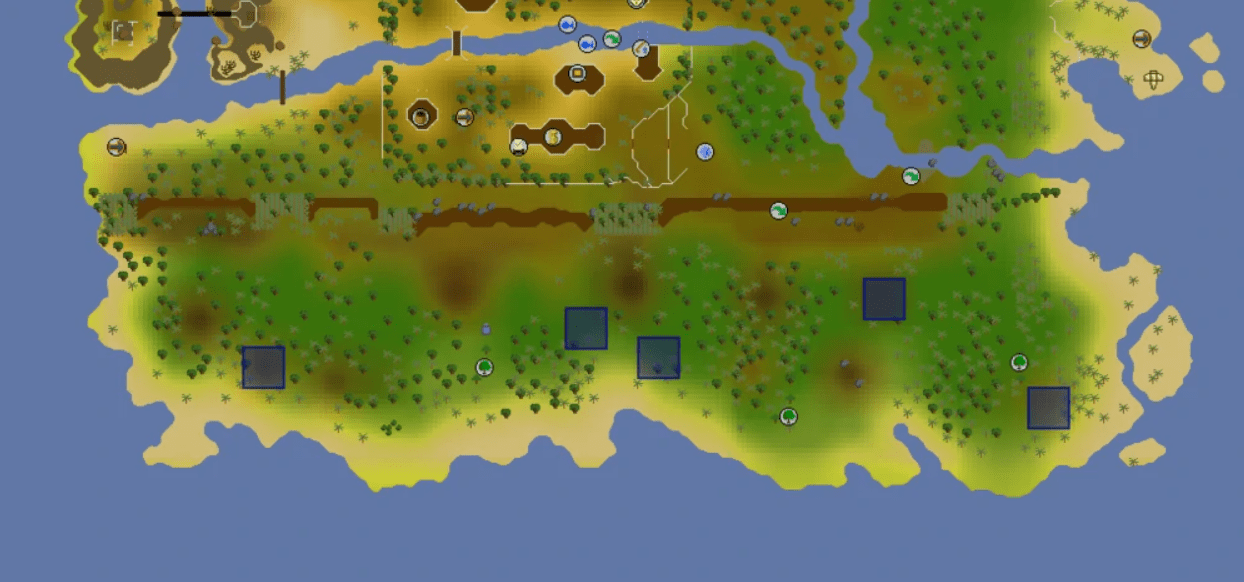
It is important to note that you’ll have to do a lot of banking and traveling during this quest. This means you can get through it much faster if you have access to Fairy Rings. If you do, you can use the code CKR to go to a bank near the jungle. If you can’t use Fairy Rings, you’ll need to go to Brimhaven and hire Hajedy’s Cart to take you to Shilo Village for 200 Coins. On your way to the jungle, swing by Shilo Village either way to buy a Charcoal or two.
Completing the Map
Required Items: Radimus Notes, Charcoal, 3 Papyrus, Machete, Axe
To start the quest properly, you’ll need to head south from Shilo Village and enter the jungle by cutting through some vegetation. Doing so will require you to use both your Axe and your Machete. Once you enter the jungle, you’ll have to right-click on the incomplete map that Radimus gave you and select the “Complete” option. This action requires you to have Charcoal and Papyrus in your inventory, so you may want to bring some extra just in case they break in the process.
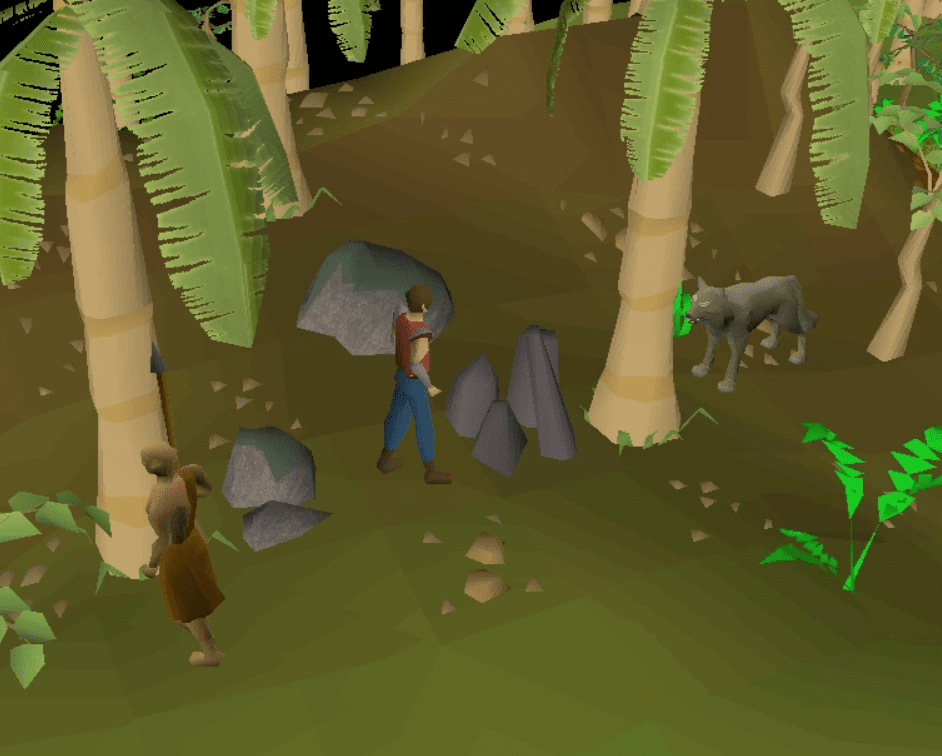
As you walk around the jungle mapping, make sure to keep an eye out for wolves as they are aggressive and will attack you if you get too close to them. However, you don’t have to worry about the Jungle Savages or Oomlie Birds unless you provoke them. After you’ve completed the map, you’ll need to find a Jungle Forester. These can most easily be found around the outer rim of the jungle. When you find one and talk to them, they will offer to give you a Bull Roarer in exchange for being able to copy your completed map.
To let them copy your map, use it on them and they will give you the Bull Roarer in exchange once you have the Bull Roarer, head back into the jungle and look for the totem poles. There are five totem poles across the jungle, so you’ll need to go to each one and use the Bull Roarer. At one of the totem poles, it will summon a character named Gujuo. When he appears, he will tell you that the shaman of his tribe has been kidnapped, and he asks you to help with rescuing him.
The shaman, named Ungadulu, is found inside a cave in the northwestern portion of the jungle. You’ll have to squeeze through some rocks to enter the cave, so keep an eye out for those while you’re looking for it. Once you’re in the cave, you need to right-click on the Fire Wall and select “Investigate.” This will allow you to talk to Ungadulu.
After you talk to him, you’ll need to search the cave’s crate, bed, and table to find three different notes. Read the notes to learn how Ungadulu was preparing to commune with his ancestors. After reading the notes, head outside the cave and use the Bull Roarer again to summon Gujuo to you. When you talk to him, say that you need pure water and then ask what kind of vessel you need to receive a sketch of an appropriate vessel.
Deeper Into the Cave
Required Items: Soul Rune, 2x Law Runes, Mind Rune, Earth Rune, Lockpicks, Axe, Machete, Radimus Notes, Pickaxe, Cut Gems
At this point, you’ll need to head back into the cave, but before doing so, make sure you have all the required items. This is because you’ll need to run past or fight dangerous Death Wings that you don’t want to have to run past again to get items. Once you have all the items in your inventory, go into the cave and head to the eastern side. Interact with the bookcase to reveal a crevice you can squeeze through.
Continue through the cave tunnels you find on the other side until you come to the Ancient Gate. To open it, you’ll need to use your Lockpicks. After opening the door, continue until you come across three boulders you need to mine with your Pickaxe. You’ll then have to force open some gates. Once you do, activate the Protect from Melee prayer and run past the Death Wings that will attack you.
As you run away from the Death Wings, you’ll eventually come across a Jagged Wall that you can jump over. After continuing, you’lll come across a riddle inscribed on the cave wall. The answer to the puzzle is using your runes on the secret in the correct order to spell the word “Smell” or Soul-Mind-Earth-Law-Law.
Once you’re done with the riddle, continue to the next room, where you’ll find seven Carved Rocks in pools of water. Head to the Carved Rock in the southeastern pool and use your Cut Sapphire. Head to the southwest and use your Cut Diamond on the Carved Rock there. Head straight north, and you’ll use the Red Topaz, followed by going southwest and using your Cut Ruby. You’ll then need to go north again and use your Cut Jade on the Carved Rock there. Then, go west and use your Cut Emerald before finally heading north and using your Cut Opal.
If you’ve placed all of your gems correctly, an item called a Binding Book will show up. Head over to the Binding Book and take it before heading out of the cave. Make sure you don’t lose the Binding Book otherwise, you will have to complete the entire cave sequence again.
Helping Ungadulu
Required Items: Radimus Notes, 2x Gold Bars, Sketch, Bull Roarer, Machete, Axe, Binding Book, Combat Gear
Now that you have the Binding Book, you’ll need to run to the village of the Tai Bwo Wannai tribe. There you’ll find an anvil that you can use to craft the Gold Bowl using the sketch given to you by Gujuo. Once you have the Gold Bowl, head back into the jungle and use the Bull Roarer to call Gujuo. He will help you bless the Gold Bowl, which you’ll need at least 42 Prayer points to do.
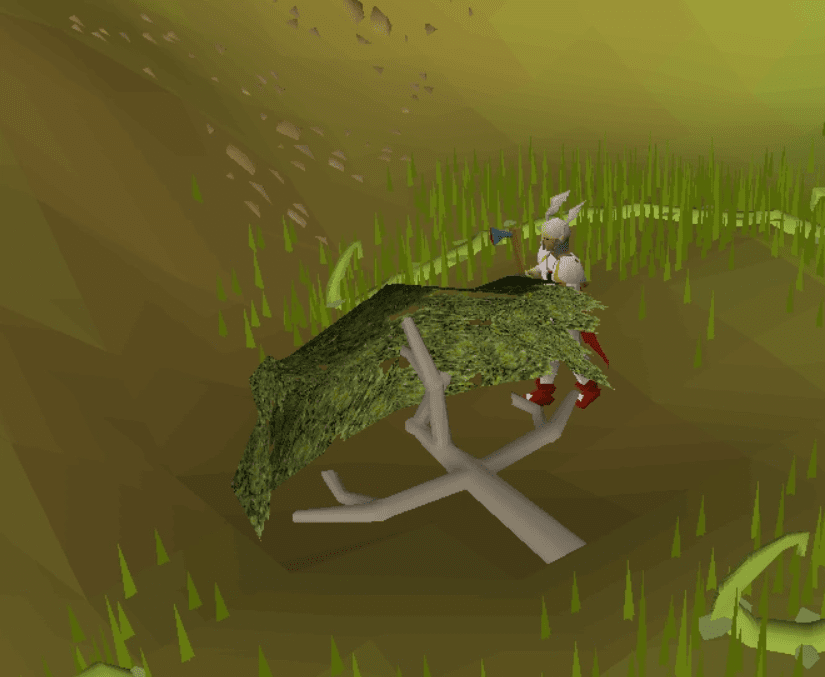
Once you have the Blessed Golden Bowl, head to the center of the jungle to find pure water in a pool that you can fill it with. You won’t quite be able to reach it, so you’ll need to cut down a Reed using your Machete and use that on the pool to siphon water out. Now that you have the Pure Water, you can travel back to the cave and use it on the Fire Wall to pass through it unharmed.
On the other side, you’ll have to use the Binding Book on Ungadulu to force the demon possessing him out of his body. You then will have to fight a Combat Level 187 demon named Nezikchened. Fight him however you prefer to, but do not interact with Ungadulu during the fight, otherwise, he will hurt you. Also, be aware that Nezikchened uses the Fire Blast spell just before dying, so make sure to have your health up so you can survive it.
After slaying Nezikchened, you can talk to Ungadulu, who will give you Yommi Tree Seeds. Ask Ungadulu how to leave, and he’ll cast a spell on you so you can pass through the Fire Wall. Leave the cave and get more pure water that you can use on the Yommi Tree Seeds. Try to refill your bowl again to discover that the pool is filled with sludge, and use the Bull Roarer to call Gujuo for help.
Cleansing the Pool
Required Items: Ardrigal, Vial of Water, Snake Weed, Radimus Notes, Machete, Pickaxe, Rope, Blessed Gold Bowl, Unpowered Orb, Lockpicks
When you talk to Gujuo, he will tell you that the source of the pool of pure water must be blocked. He says that the only way to the source of the pool is through a dark tunnel that you’ll need a Bravery Potion to make it through. Mix the Ardrigal and Snake Weed with your Vial of Water to make the potion and drink it. You can drop the empty vial to clear up space in your backpack.
Head back to the cave where Ungadulu was held captive and go through all of the challenges you went through to get the Binding Book. Once you reach the room where you got the Binding Book, you can find another door deeper in the room. Cast a Change Orb spell on it, and it will open, revealing a room filled with barrels.
Inside the barrel room, use your Rope on the Winch to head down. This will put you on a long path covered in rocks. Climb over the rocks to progress down the path, where you’ll find three undead warriors. You need to kill all three undead warriors individually as they drop a Lump of Crystal, Chunk of Crystal, and Hunk of Crystal. Once you have all three items, take them to the furnace further down the path to form them into a Heart Crystal.
You can then head south to find a field. Look at your minimap and orient it so that the cave looks like a dragon’s head and head to where the dragon’s eye would be. You’ll find a Mossy Rock there that you need to use the Heart Crystal on. Head back to the field you just left and use the Heart Crystal on the recess next to it, lowering the energy barrier there.
On the other side of the Energy Barrier, you’ll find some demons and the source of the Pure Water. The source will be blocked with a boulder you need to try and move to make a spirit named Echned Zekin appear. He will ask you to take a Dark Dagger and kill another spirit named Viyeldi for him. Take the Dark Dagger and return to where you left Ungadulu in the cave. Use the Dark Dagger on him, and he will take it from you but give you a Holy Force card.
Head back to the bottom of the cave and interact with the boulder again to make Echned appear. Use the Holy Force card on him, revealing that he is Nezikchened. You will then have to fight him a second time, similar to the first fight. Once he is dead, you can push the boulder out of the way of the source of Pure Water.
The Final Stage
Required Items: Radimus Notes, Bull Roarer, Axe, Machete, Blessed Gold Bowl, Yommi Seeds, Combat Gear
Now that the Pure Water source is cleared, you can head back to the pool. Fill your Blessed Gold Bowl there and use it on the Yommi Seeds before summoning Gujuo again with the Bull Roarer. You’ll then need to fill your Blessed Gold Bowl again before heading to the Fertile Soil in the jungle. This area is clear of vegetation and appears as a brown area on the map.
Use your Yommi Seeds on the Fertile Soil there to plant them. It may say that you failed to plant them, but you can repeatedly try until you are successful in doing so. Once the tree starts growing and reaches its second stage, you’ll need to use your Pure Water on it to help it continue growing. Once it is done growing, you’ll need to use your axe on it repeatedly to remove all of its branches. This will allow you to shape it into a Yommi Totem and pick it up.
You’ll then need to explore the jungle until you find an old totem and place your Yommi Totem onto it. This will summon Nezikchened for a final battle, so use your Protect from Melee prayer before placing it. Once you complete the fight against Nezikchened for the third time, you’ll need to replace the totem. Gujuo will then appear and talk to you before giving you a Gilded Totem. With that, head back to the Legends’ Guild and give him both Radimus Notes and the Gilded Totem.
Quest Rewards
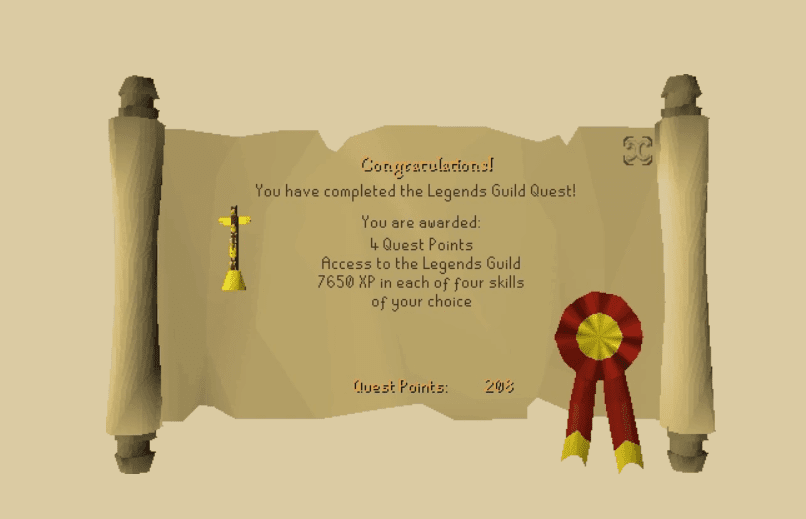
Upon completing the quest, you’ll get four Quest Points, access to the Legends’ Guild, will be able to use Dragon Square Shields, and access to the Kharazi Jungle. You’ll also be able to have Radimus train you in one of twelve skills four times. Each time you are trained, the chosen skill will receive 7,650 experience, and you can choose from any of the skills required to start the quest.
FAQs
Question: What quests require the completion of Legends’ Guild?
Answer: You have to finish the Legends’ Guild quest to end the Ardougne Hard Diary, Dragon Slayer 2, Karamja Hard Diary, and Recipe for Disaster.
Question: What is the easiest way to reach the Legends’ Guild?
Answer: The most efficient way to teleport to the Legends’ Guild is using Fairy Code BLR, which puts you right outside its gates.
Question: How do I get the Cape of Legends in OSRS?
Answer: The Cape of Legends can be purchased in the Legends’ Guild after finishing the Leygends’ Guild quest for 675 Coins.
Conclusion
The Legends’ Guild quest is an essential part of the history of Runescape. It is an excellent opportunity to see how high-level gaming content used to work and get access to other high-level quests in OSRS. So, if you have the skill requirements met, I can’t recommend attempting the quest yourself enough so that you can join the prestigious Legends’ Guild yourself.
Looking for more interesting readings? Check out:
- Duradel OSRS Guide: The Highest Level Slayer Master
- Alchemical Hydra OSRS Guide: A Hard Boss With Great Rewards!
- Garden Of Tranquility OSRS Guide: An Interesting Farming Quest
- Zulrah Guide - October 22, 2022
- Tempoross OSRS Guide - October 15, 2022
- Calisto OSRS Guide - October 15, 2022