

- What is The Monkey Madness Quest In OSRS?
- Is This Quest Difficult?
- How to I Start This Quest?
- Does This Quest Have Any Requirements?
- What Stats Should I Have Before Beginning Monkey Madness?
- Does This Quest Have Any Bosses?
- Monkey Madness: Our Walkthrough
- What Rewards Does The Player Recieve Upon completion?
- Does This Questline Have A Direct Sequel?
- Go Ape!
- FAQ Section
OSRS is a gaming franchise that has spanned across gaming generations, beginning its assault on the MMORPG landscape and over twenty years later, still remaining relevant as one of the biggest names in the genre. It’s a testament to the quality of the content that is on offer within this game.
The title has consistently added more enemies, more items, more bosses, more NPC’s, more skills and arguably most importantly, more quests for the player to work through.
The abundance of quests that players now have to check off their list is staggering, especially if you are a paid OSRS member. Meaning that when you kick off your journey, there are hundreds upon hundreds of hours to get through. Now, don’t get us wrong, this is great.
However, with so much content to absorb and understand, it can become a little overwhelming. So that is why we have created a series of guides, walking you through every detail of OSRS quests and guiding you from start to finish in the least stressful way possible.
In this guide, we take a look specifically at the Monkey Madness quest within OSRS. This master difficulty guide is one of the most well known within the entire game and one that can prove a challenge if you aren’t on the ball.
So allow us to provide our guide and give you the best chance of success. Here is our essential guide for the Monkey Madness quest in OSRS.
What is The Monkey Madness Quest In OSRS?
Monkey Madness is a quest geared towards high-level players within the OSRS series. This quest is the follow-up quest to ‘The Grand Tree’ quest and is part of the gnome quest series.
This quest takes place on the island of Ape Atoll which will see you interact with civilised but hostile primates, hence the term, Monkey Madness. This quest is given by Narnode Shareen who will request that you help them track down the missing 10th Squad, a division of the Gnome Royal Guard.
This military unit ran into trouble when the king requested that this group travel to Ape Atoll to oversee the decommissioning of a ship manufacturing facility on the island.
However, this simple task is yet to be completed and the group have been gone for some time, so it is up to you the adventurer to track them down.
This leads to a progressively compelling mystery which you must unravel for yourself. Nothing is as it seems and a great evil has spread to the distant island of Ape Atoll. However, if you have your witts about you, you’ll be just fine.
Is This Quest Difficult?
Yes, this quest is aimed at experienced and highly levelled players. Ape Atoll is one of the most dangerous areas in all of OSRS and without a Monkey Greegree, the player will need to take plenty of provisions with them if they want to survive.
The quest is a very long one, with four chapters to complete. Plus, the player will have to collect a series of quest specific drops from enemies, solve a series of tricky puzzles and in the end, you will have to take on the fearsome Jungle Demon which is a boss battle with a combat level of 195, making it one of the more formidable foes and certainly one of the strongest bosses that F2P players will encounter.
So in short, yes, Monkey Madness will prove a challenge for many players.
How to I Start This Quest?

After you have completely finished ‘The Grand Tree’ you will be able to talk to Narnode Shareen once again. They will inform you of the strange disappearance of the 10th Squad and will ask the player to travel to the shipyard in Karamja.
They will give you the Gnome Royal Seal which will grant you passage to this area and from there, you will be able to follow the road map for this quest. You can find Narnode Shareen at the Grand Tree to begin this conversation.
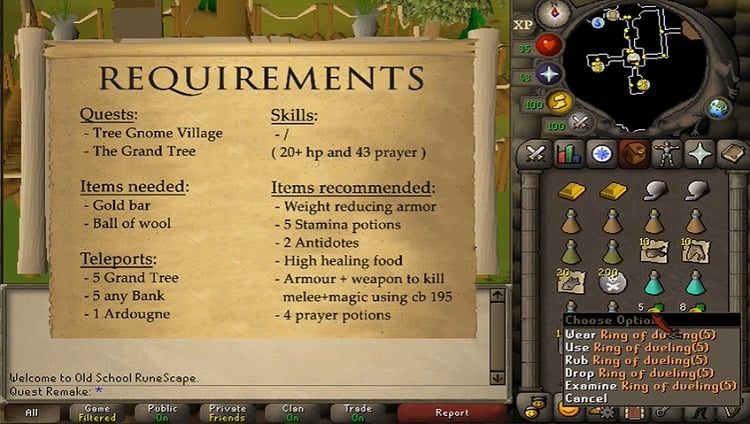
Does This Quest Have Any Requirements?
Yes, this quest has quite a few specific requirements firstly if you want to have a chance of making it through the quest in one piece. Plus, if you want to progress through the quest, you’ll need specific gear for the task at hand.
Firstly, as mentioned you will need to have completed The Grand Tree as well as the Tree Gnome Village quest lines. Then in terms of specific quest items, the player will need to get their hands on a ball of wool, a gold bar and monkey bones/corpse.
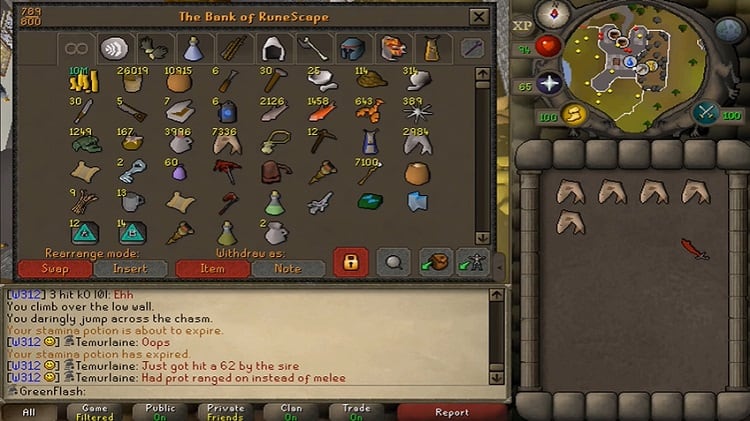
Above are the absolute bare essentials. However, to realistically get through this quest, the player will also need quite a few other items. Here is a quick list of all the required goods you’ll need to pack in your inventory if you want to complete Monkey Madness:
- Stock up on plenty of anti poison and antidote++ potions as you will encounter poisonous scorpions on this quest.
- Energy potions
- Stamina potions
- Prayer potions
- Bring a knife as this will offer a source of environmental healing. There are a number of pineapple trees littered around Ape Atoll.
- Quality food (ideally Shark)
- A lockpick
- Lightweight clothing and weight reducing clothes if possible
- An emergency teleport such as the Ardougne Cloak and it’s respective teleports
- 200,000 coins which will allow you to skip the puzzle (Optional)
What Stats Should I Have Before Beginning Monkey Madness?
Alongside the above requirements, it is also important to have a character build that is conducive to a successful run to the end of this quest. Firstly, here is a list of the base stats that we would suggest before you take on Monkey Madness:
- Attack: 60+
- Defence: 60+
- Strength: 60+
- Magic: 33+
- Ranged: 45+
- Prayer: 43+
The reasoning for these stats is that you will need to have enough attack, strength and defence to take on the Jungle Demon. You will need a high prayer stat to stay alive and avoid incoming attacks while running through the cave system.
You will also need 33+ magic if you want to tele-grab a gold bar from a bank, or alternatively, you can scale your smithing stat to 40+ and then you can smith one for yourself. You can also obtain this item through an enemy drop so these are not strictly necessary but they will make your life much easier.
Does This Quest Have Any Bosses?
Yes, as mentioned this quest has a final boss called the Jungle Demon. This boss in terms of appearance is rather similar to the other demons in the series.
The monster looks rather like a devil, with a long tail with a spike at the end, a set of wings not unlike a dragon, yellow horns, claws and cloven hooves.
The beast also has piercing red eyes and a sharp set of teeth. In terms of size, the Jungle Demon is 3×3 tiles and has a combat level of 195. Here is a list of the base stats for this creature:
- Attack: 170
- Defence: 170
- Strength: 170
- Health: 170
- Magic: 170
- Ranged: 1
This beast is one of the strongest demons within the game and will offer a real test to advanced players. This creature uses a mix of ranged and magic attacks to take down its foes.
The best way to take on this creature is through ranged, the dwarf multi cannon or you can use the dwarves in the area to your aid as they will drop the creature to as low as 10HP while you stand on the edge of the battle arena.
However, do not let the Gnomes kill it as it will restore the Jungle Demon’s health by 20%.
Monkey Madness: Our Walkthrough
Chapter 1
Ok, so now let’s walk through the lengthy process of completing Monkey Madness. As we mentioned above, to begin this quest you will need to travel to The Grand Tree and speak to King Narnode Shareen.
They will trigger the quest to begin, give you the Gnome Royal Seal and send you to check the boat manufacturing plant in Karamja. The fastest way there is via the glider service at the Grand Tree, however, you will need monkey bones to do this.
Upon arrival at the Glough Shipyard, seek out G.L.O. Caranock who is in the southern region of the Shipyard. This will lead to a very cagey and strange conversation that only raises more questions. From here, return to King Nardone and he will tell you to seek out Daero.
He will be your ticket to Ape Atoll. This is the ideal time to stock up on provisions such as high-quality food, anti position and antidote++ potions.
Then once you feel ready, head to the first floor of the Grand Tree and speak to the new Head Tree Guardian. Assure him that you are prepared to leave and this will trigger your travel to Ape Atoll.
However, between this travel, there is a re-initialisation process. You will need to speak to Daero and then Waydar. This will allow you to take part in the re-initialisation puzzle which is a sliding block puzzle that reveals a picture of a glider.
This is very similar to the puzzles in the Treasure Trials and shouldn’t give you too much trouble. However, if you cannot solve this problem, you can pay Glough 200,000 coins to solve this puzzle for you.
You can find him at the Grand Tree and then after paying, simply return to the hangar where Daero and Waydar are. Talk to them after completing the puzzle and you’ll end up on Crash Island.
This is where the 10th Squad initially landed. You need to ask Lumdo to sail to Ape Atoll. He will initially refuse so talk to Waydar and then return to Lumdo and he will agree to take you.
It is worth noting that Waydar is very close to poisonous scorpions so be prepared to fight and deal with poison before you get to speak to him. This concludes the first chapter.
Chapter 2
You should now be at Ape Atoll. From here, follow the southern coastline and you will eventually reach the Mahogany Tree.
This will trigger a swarm of enemies such as Snakes, scorpions and jungle spiders that will chase you. Immediately run north and head toward the Ape Atoll gates. You will need to activate your protection from projectiles prayer as you run.
Then once you approach the gate, you will get hit with a flurry of poison arrows. However, don’t panic as this is supposed to happen. You will later wake up having been imprisoned.
You will need to escape the prison now. So first talk to Lumo the imprisoned 10th Squad member and then wait for the guards to rotate shifts.
This will give you a window to pick the lock on the door. Then wait until the guard is going to swap shifts again. Walk-behind them as they leave and this will allow you to leave undetected.
From here you will want to travel north until you reach a crafting shop. In the bushes, you will find Karam, a well-hidden member of the 10th Squad. Speak to them and then travel south. On the way, you should pass a large door and then travel around the castle counterclockwise.
Then head east when you reach a white building. If you follow this path, you will find Garkor, the sergeant of the 10th Squad. Speak to him and go through his dialogue until you get told to seek out Zooknock.
From here, head north until you come across a set of marked doors and ensure you have missile protection enabled as you go.
When you reach the doors, go through the one marked with a blue square and you should encounter a Monkey Guard with a banana crate and a dentures crate.
The Monkey will be sleeping. You will need to only travel on the dark brown ground to avoid detection from the guard. If detected you will be sent back to jail.
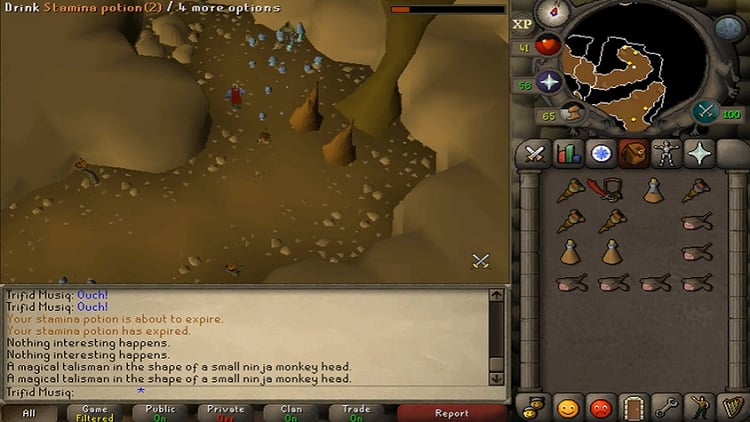
You will need to go through the area which is filled with poisonous scorpions and eventually you will come across a stacked set of crates. Raid this and you will find monkey dentures.
You will also need to travel to the northwest cavern of the area and search the crates for a M’amulet mould. Note that there is a drop that will incur fall damage so heal before you head to this location.
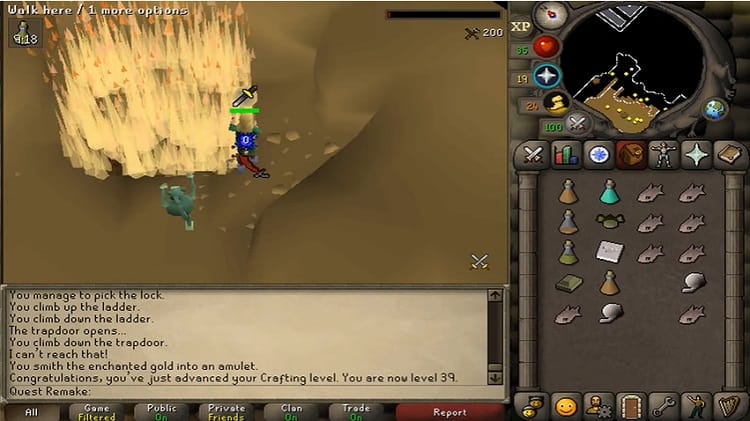
Now, assuming that you already have a gold bar, head to the southern area of the island, just west of where you will find Lumdo and you will find a tunnel. Enter this and you’ll be within a dungeon. You will need to follow the path along this dungeon.
It is rather linear so no need to panic about getting lost. There are some hazards such as enemies who hit for melee damage, falling rocks and claw traps. However, none pose that much of a threat and aside from using some melee protect prayers where applicable, can be largely ignored.
At the end of the winding path, you will finally encounter Zoonnock. Use the monkey dentures, Gold Bar and M’amulet mould on him and he will give you an Enchanted Bar.
Do not leave without this. Now you must go northeast. You will be placed in jail again but just escape as you have before and head for the temple near Marim. There is a trapdoor found to the east of the temple. Descend down this and you will find yourself in yet another dungeon.
The easiest route to the trapdoor is up the stairs, down the ladder on the east side and then slip through the trapdoor. Proceed through this area, avoiding the Monkey Zombies and then use the enchanted bar on the wall of flames.
Then make your way out of this area and get yourself to a safe spot, you can also teleport and replenish supplies if this is easier.
You will then want to combine the ball of wool and the amulet to create the m’speak amulet. Then travel to the jail and then directly west of the jail.
You should encounter a banana garden with a monkey child. You need to speak to this child but be sure to avoid the monkey child’s aunt that patrols the area on a predetermined loop.
Then tell him that you are his uncle. He will request 20 bananas from you but you only need to get five from a nearby tree for them as the child cannot count. You then need to ask him for the monkey Talisman.
Then you must return to Zoonnock by travelling through the winding dungeon path again. Then use the monkey bones and the monkey talisman on him and he will award you with a Monkey Greegree.
Chapter 3
Now that you have the Monkey Greegree, equip this item and you will become a monkey. This will allow you to wonder Ape Atoll without being attacked or imprisoned by the residents of the island.
After this equip the M’speak amulet to allow you to communicate with the monkeys and return to Garkor. Speak to him and then the Elder Guard. He will tell you to go and talk to Kruk.
Now run west into Marim and head up the southern path then up the western hill, climb the bamboo ladder, cross the bamboo bridge, go down the ladder on the east side and you will find Kruk.
Speak to them and they will take you to King Awowogei. Speak to the king and offer your help to rescue a monkey from the Ardougne Zoo.
Agree and then head to Ardougne Zoo. You will need to have your Monkey Greegree equipped for this task. Speak to the monkey minder in the zoo and they will place you in the monkey cage.
Then speak to one of the monkeys in the cage and they will jump into your inventory. Then unequip the greegree and speak to the minder to be released again. Then go to Daero who will take you to Ape Atoll, teleporting is not an option with the monkey in your inventory.
Once you arrive back in ape atoll, return to the king and speak to them. They will confirm your alliance and then speak to Garkor.
Chapter 4

You will be given the 10th Squad Sigil. Use this as a means of teleporting to the final boss area where you will encounter the Jungle Demon.
The best strategies as we have mentioned are using ranged attacks, using a dwarf multi cannon equipped with 20 cannonballs or allowing the gnomes to fight the battle while you sit on the edge of the battle arena and then when the boss is down to ten health, run in and deal the final blow to the beast.
You can also use melee to take down this boss but it is definitely not the safest or easiest option. Then as for magic attacks, the beast has a large resistance against these so do not use this method.
Once you have slain the Jungle Demon, speak to Garkor who will tell you to speak to Zoonnock to teleport out of the battle area. Do this and you’ll end up back in Ape Atoll.
Then you must make your way back to the Gnome Stronghold by whatever means you prefer. Then head to the Grand Tree, speak to King Nardone and this will conclude the quest, Monkey Madness.
What Rewards Does The Player Recieve Upon completion?
If you have followed the walkthrough above to the letter, then you will have completed this quest and for that, we only have praise and admiration.
However, you may be wondering what you get for your efforts. Well, allow us to inform you. Here are all the spoils from completing the Monkey Madness quest:
- Three quest points
- 10,000 XP
- 3 diamonds
- 35,000 Attack XP
- 35,000 Defence XP
- 20,000 XP in Strength and HP
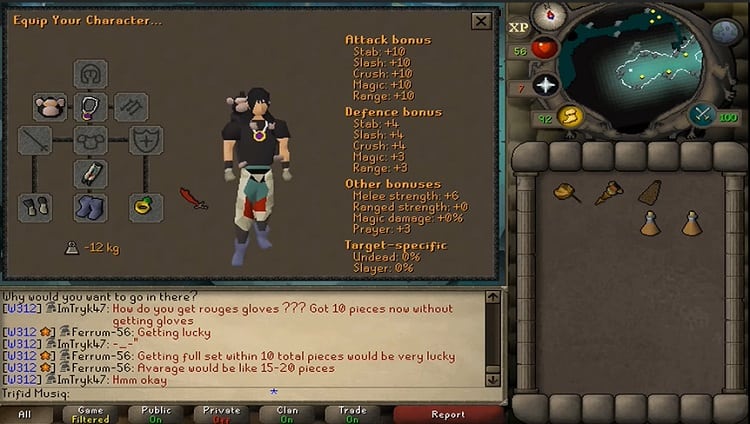
- Ability to wield the Dragon Scimitar
- Ability to turn into a monkey outside of the quest
- Full access to Ape Atoll
Does This Questline Have A Direct Sequel?
Yes, this has a direct follow-up quest called Monkey Madness II: The Renegade Returns. This will involve the player hunting down the war criminal Glough and stopping his next evil scheme. He is hell-bent on killing all humans and taking Glienor for himself and you’ll need to stop him before it’s too late.
This quest is one of the longest in the entirety of OSRS, had a huge list of requirements, requires a very strong and skilled character build and requires the player to defeat a series of bosses and mini-bosses. Including the very powerful Glough at the end of the questline.
Go Ape!
As you can see from the information is above, Monkey Madness is a long and complex quest with a lot of moving parts and requirements. However, if you can brave Ape Atoll, channel your inner ape and take down the Jungle Demon, you will be generously rewarded for your efforts.
It’s a very tricky questline and only one that you should only take on if you are up for the challenge. So get prepared and go ape!
FAQ Section
If you have reached the end of this article and you still don’t have the answers that you need, you may want to check out our FAQ section which should have all the details you need. Here it is below:
Question: What is Considered the Hardest Quest in OSRS?
Answer: While many would argue that Monkey Madness II would be up there, we think that the general consensus is that dragonslayer II is the hardest quest in OSRS. You’ll need to have 200 quest points and pretty much all main stats at 80+ to consider starting this quest.
There are tonnes of hurdles, perilous areas to explore puzzles to solve and ultimately, the player will have to take on a series of dragon bosses, with one of these enemies boasting a crazy combat level of 608 and offering four unique battle phases. So in short, you are going to have a tough time here.
Question: What Video Game Series is Referenced in This Quest Line?
Answer: If you aren’t aware, OSRS is partial to a pop culture reference, and not so relevant references for that matter.
The game makes reference to popular game series, books, movies and other media and in the case of the Monkey Madness Quest, it makes reference to the popular point and click game series, Monkey Island.
Many will be aware of the brilliant Escape from Monkey Island point and click series and will be aware of the distinctive hand-drawn cartoon art style.
Well, in this quest line, the player will be able to see the similarities to that game’s art style and thus quest’s chapter cards. Plus a lot of the cut scenes have direct and indirect references to the series which will be a pleasant easter eggs for older generations of gamer who enjoy this quest.
Question: Was This Quest Really Created By One Person?
Answer: Yes, it absolutely was. It was created by one employee who was able to put this quest together in the space of one summer while working for Jagex. However, what may shock you is that this employee was only a temporary intern who was working for the company over the summer period.
They managed to create one of the most beloved and difficult quests in the history of the franchise and while we don’t know who this employee was, we hope that they were offered a full-time contract for their efforts.
So that is our essential guide on the master difficulty OSRS quest, Monkey Madness. What do you make of this guide? Was this helpful and informative for you?
What other guides would you like to see from us in the near future? Let us know in the comments section below and as always, thank you for reading.
Looking for more interesting readings? Check out:
- Turoth OSRS Guide [2022]: How To Slay It Like A Pro!
- OSRS Waterfall Quest Guide: A Brilliant Start For Fresh Accounts!
- OSRS Ardougne Diary Guide [2022]: The Fastest Way To Complete It
Outside of working hours, he stops typing and picks up a controller. His favorite games of all time are Runescape, Kingdom Hearts, Journey, Fallout New Vegas, Disco Elysium, and he also dabbles in Rocket League in the lulls between titles. When he’s not gaming, you can find him rewatching Peep Show for the hundredth time or re-living his youth skating. Skateboards are the new comb-over, haven’t you heard?
- Regicide OSRS Guide: A Complete Walkthrough - September 30, 2021
- Monkey Madness OSRS Quest Guide: An Adventure on Ape Atoll - September 22, 2021
- Black Dragon OSRS Guide: Taking on these Dark Draconic Terrors - September 5, 2021