

The ongoing story of OSRS is a real treat for fans that enjoy learning about the ever-expanding and evolving world of the MMO, and are fans of games like Guild Wars. Since the launch of OSRS, the world’s story has been given more depth through quests that weren’t in the original game. I’ve found a lot to love in these quests, as providing the world of Runescape a more remarkable story adds a lot of lore and personality to enjoy. One of my favorite new plot quests added so far is A Kingdom Divided that we will cover in this quest guide.
Key Info Up Front
- Member Only: Yes
- Requirements: Agility Level 54, Thieving Level 52, Woodcutting Level 52, Hrblore Level 50, Mining Level 42, Crafting Level 38, Magic Level 35
- Required Items: Axe (may need OSRS gold to buy it), Spellbook, Defence Potion, Volcanic Sulphur, molten Glass, Dark Essence Block
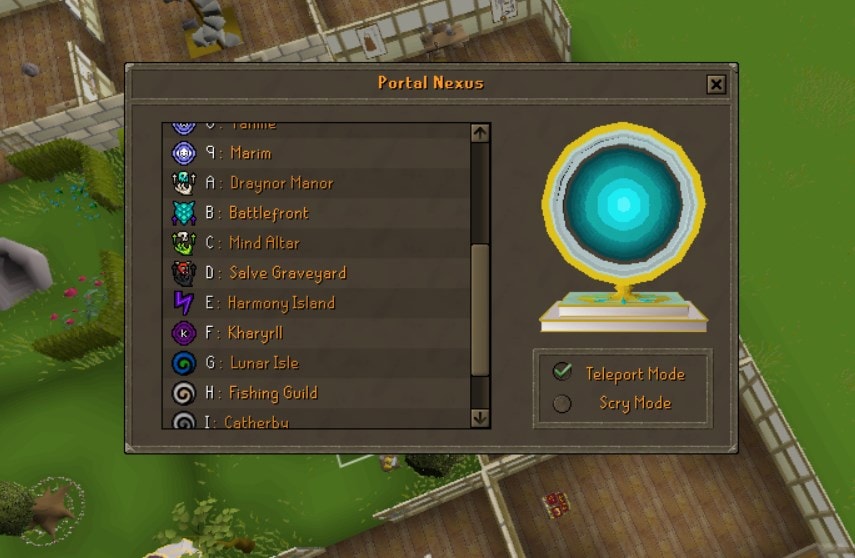
- Rewards: 2 Quest Points, Book of the Dead, Antique Lamp, Kourend Castle Respawn Point (won’t have to go through places like Port Sarim anymore), New Arceuus Spells
A Kingdom Divided Overview
A Kingdom Divided was added to Oldschool Runescape in June 2021 to continue the OSRS quest series known as the Great Kourend. You may know this quest series from locations like the Kourend Woodland and more. This means that before you can begin this quest, you first have to complete the quests that preceded it. In order, these are:
- Client of Kourend
- X Marks the Spot
- The Depths of Despair
- The Queen of Thieves
- The Ascent of Arceuus
- The Forsaken Tower
- Tale of the Righteous
Once you’ve gotten those quests out of the way, you’ll be ready to continue the story and help the Kourend Council unroot a corruptive source that has infiltrated its tight circle. It is also worth pointing out that the official difficulty and length of the quest place it as Experienced and Long. The official difficulty of Experienced means that you’ll have to complete this quest once you have moderate levels in a range of skills and access to rare or expensive items. The Long length means that the quest can take a couple of hours to complete, including walking between locations. However, you can split the quest between multiple play sessions to help manage it.
How to Start A Kingdom Divided
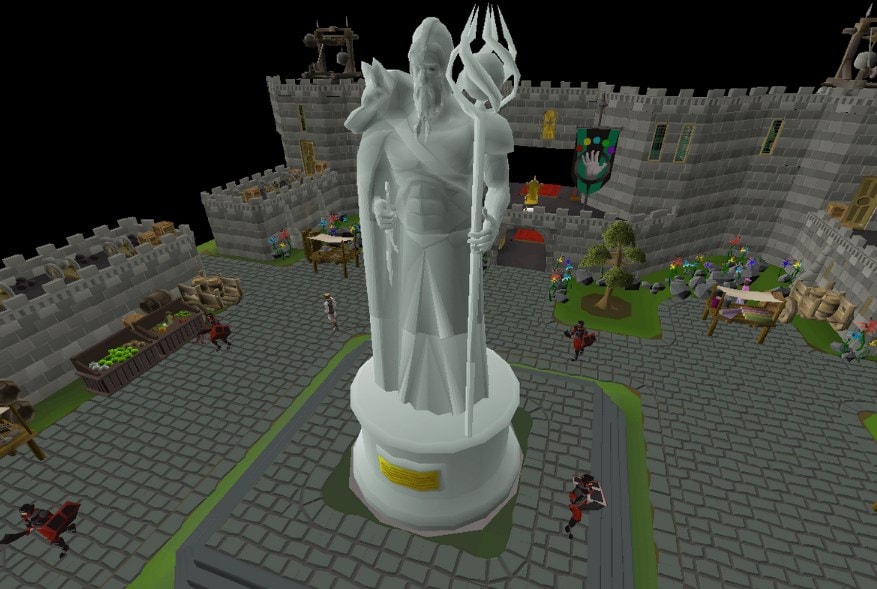
Once you’ve played through all the above quests, you can start A Kingdom Divided by traveling to Kourend Castle. By the time you’ve reached this quest, you shouldn’t have any problem finding it in Kingstown. Once you’re there, you have to talk to Martin Holt, who will inform you about the situation within the court and ask for your assistance in figuring it out.
However, you must also level up seven skills to pretty respectable levels. Below are the skills you’ll need to level and some tips on how to do so.
Agility Level 54
If you’re starting with Agility Level 1 before wanting to go through this questline, you’ll need to start by going to the Gnome Stronghold Agility Course. It can be found in the Tree Gnome Stronghold south of the Grand Tree. You need to run through a short obstacle course repeatedly to farm Agility experience. You’ll run that course until you reach Agility Level 10. Then, you should switch to the Draynor Village Rooftop Course, which you can run until Agility Level 30. For your next ten levels, head to the Varrock Rooftop Course; for the final fourteen, seek the Canifis Rooftop Course.
Thieving Level 52
Leveling the Thieving skill can be very repetitive. To go up the first five levels, you’ll want to pickpocket generic Men and Women NPCs that can be found throughout the game’s cities. After that, you’ll be ready to move on to stealing from the bakery stalls in East Ardougne, which you can repeat until you get to Thieving Level 25. With that level, you’ll be promoted to stealing from the fruit stalls in Hosidius until you reach Thieving Level 45. Do this by the two fruit stalls by the house near the beach, as you can go back and forth between them, and there are no guard dogs that will patrol nearby and find you. You can then move on to stealing artifacts from Port Piscarilius until you reach the required Thieving Level 52. However, for this method, you’ll need to have a solid relationship with Port Piscarilius, equal to 75% favor.
Woodcutting Level 52
Woodcutting is one of the least profitable skills to level in OSRS, so there is a good chance you’ll need to level it up before taking on this quest. To start, chop down regular trees repeatedly until you reach Woodcutting Level 15. You can then upgrade to Oak Trees until you reach Woodcutting Level 35, which you can find throughout common areas like Lumbridge. Finally, you’ll want to move on to the Teak Trees found on Fossil Island, Isle of Souls, or Ape Atoll, for example. These are the most experience-efficient source of Woodcutting Level, so you can even do these to Woodcutting Level 99 if you want. The Woodcutting Guild is also a huge help here.
Herblore Level 50
Before you can start leveling up your Herblore skill, you’ll need to complete the quest Druidic Ritual. This will get you up to Herblore Level 3 right off the bat. I then recommend completing the quests Jungle Potion, Recruitment Drive, and The Dig Site, as these will get you to Herblore Level 19 much faster than you would be able to just through making potions. You should make some Antipoison potions using Unicorn Horn Dust since you’ll need one for the quest anyway. Then, when you unlock Energy Potions at Herblore Level 26, make those until you reach Herblore Level 50 since those will also come in handy.
Mining Level 42
If you’ve done any Smithing in OSRS, you’ll likely already have your Mining Level high enough for this quest. If you haven’t, however, it is one of the easiest to raise on this list. To reach Mining Level 15, just mine either Copper or Tin ore, and then move on to Iron Ore. These ores are very easy to find throughout all of Runescape‘s world, so you shouldn’t have a hard time finding one that works. If you aren’t interested in Smithing and making armour at the moment, you can even just drop the ore you get on the ground and not have to store it.
Crafting Level 38
You’ll make leather items for the first 20 levels of your Crafting training. This means you’ll need a bunch of Leather, 50 Thread, and a needle. Once you get to Crafting skill level 20, however, you can start cutting gems until you reach Level 38. You’ll have to buy these gems to get them as quickly as possible using your RS gold, but you can also save any that you find while leveling Mining to save some gold.
Magic Level 35
There are quite a few ways to level up your Magic skill, but for the sake of preparing for this quest, there is one I favour above the rest. This is because it is straightforward and can carry you to Magic Level 55, so it will get you to 35 quickly. To do it, use combat spells to kill crabs. These have high defense, will fight you for ten minutes straight, and don’t hit for much damage, making them perfect for farming. You can pick from the Rock Crabs in Rellekka, the Sand Crabs in Hosidius or Ammonite Crabs in Fossil Island, depending on which is easier for you to access.
Required Items for A Kingdom Divided
Before attempting to play through A Kingdom Divided, you should accumulate seven items absolutely required to complete it. These and the best methods to obtain them are listed below.
Spellbook
By this point in your time playing OSRS, you should be able to get your hands on a basic spellbook relatively quickly. I also recommend bringing Fire Runes along so that you can cast fire spells, as those will help immensely.
Melee Combat Gear and Food
This quest does require you to survive some problematic melee combat. While the quest doesn’t have any level of combat needed I recommend not starting it until you have at least Combat Level 70. Then, equip yourself with a solid amount of gear and your preferred melee weapon, and make sure to bring a ton of food, just in case. You can either purchase food if you don’t have high cooking or make some of your own if you don’t mind putting the time in.
Ax
You will need an axe for this quest, so make sure to keep the one you use during your Woodcutting training, and you’ll be good to go.
Potions
The only potion you technically need for this quest is a defense potion with a minimum of three doses remaining. However, I also recommend bringing an Antipoison and some Energy Potions to keep the quest from being harder than it has to be.
Volcanic Sulphur
Volcanic Sulphur is a substance you can only mine in the Lovakengj sulphur mine. The mine is found on the northern side of the area and requires you to have Mining Level 42 to get it. Mining it will slowly damage you, but you only need one for this quest, so you should be able to get it without too much trouble by the time you are ready to tackle it.
Molten Glass
Molten Glass is a craftable substance used in some quests but is most often used in Crafting and Construction recipes. You’ll need to get your hands on a Bucket of Sand and Soda Ash to get it. You can get the Bucket of Sand by using an empty bucket on a sand pit or by just buying one from a charter ship shop. On the other hand, Soda Ash can be gotten by using Seaweed with a Furance or buying it from Trader Stan’s Trading Post for only five gold. Once you have both, use them with a Furnace to get this one out of the way.
Pickaxe and Chisel
You should already have a Pickaxe and Chisel from leveling your Mining and Crafting skills. So, you should bring this with you to collect a Dark Essence Block during the quest. Otherwise, getting a Dark Essence Block before the quest can save you some inventory space going into the quest to take more food or potions.
A Kingdom Divided Walkthrough
Getting Wrapped In
Items Required: None
To start the quest, you’ll need to talk to Martin Hold just outside of Kourend Castle. He is just to the east of the castle and can be found next to the protestors, so you shouldn’t have a hard time tracking him down. To start the quest, he tells you that the Kourend Council has seized control of the kingdom and is refusing to let go of power to allow the previous king’s daughter to take the throne like she is supposed to. He then gives you the first quest objective: talking to Commander Fullore.
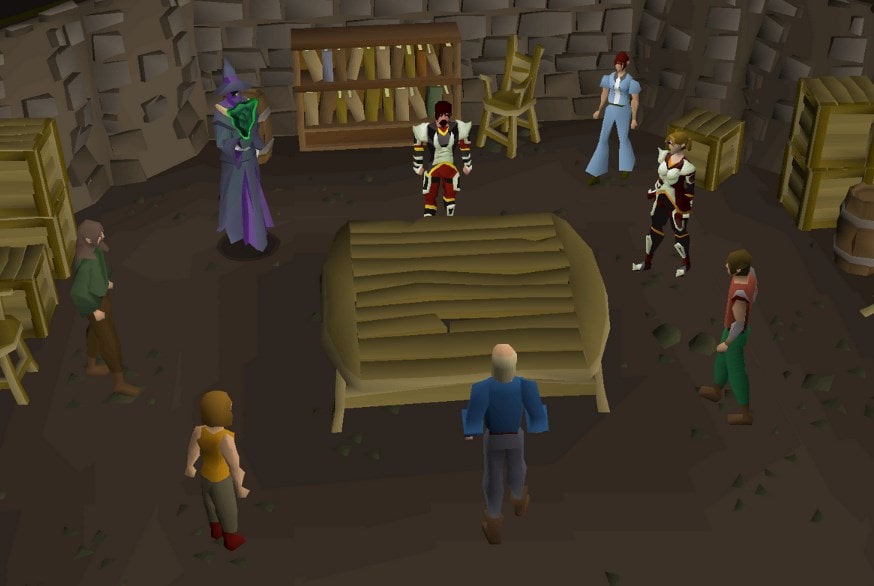
Commander Fullore can be found inside the castle on the ground floor. Once you reach her, she’ll agree to help you and trigger a cutscene. After the cutscene, head to the north, where you’ll find a house. Inside the house, you need to gather clues by searching its three floors and interacting with each interactable on them. Be warned that there is a lesser demon on the top floor that you’ll need to take care of as you search. Once you have nine clues, you’ll be ready to proceed.
After you get all the clues, please right-click on the receipt clue and inspect it to get pointed toward The Deeper Lode. Talk to Tomas Lawry outside the house before going to the Deeper Lode and talking to Fuggy. Ask him some questions, and you’ll be pointed toward a ship in Port Piscarilius.
Veos’ Ship
Items Required: Food and Melee Combat Equipment
After heading to Port Piscarilius, talk to Cabin Boy Herbert, who will be revealed to have replaced Veos. This will trigger another cutscene; afterward, you will have to fight another demon summoned to kill you named the Judge of Yama. This enemy can only be damaged with melee attacks, so don’t even try making magic or ranged work. Throughout the fight, you’ll have to dodge waves of fire by stepping on clear pier tiles, so make sure to keep an eye out for which square is safe. As long as you are well equipped and bring plenty of food to heal, you shouldn’t have a hard time getting through it.
Hunting the Princess
Items Required: Axe, Fire Runes (can get from the Grand Exchange)
Once you’ve defeated the Judge of Yama in combat, you’ll be treated to another cutscene where Councillor Andrews thanks you. Andrews will send you back to talk to Martin Holt, but Fullore’ll intercept you to talk to her to the south of the castle first. You’ll then talk to Martin Holt after getting filled in on the royal family’s history by Fuller. Holt will then send you to Arceuus Library, where you’ll have to talk to Archeio to be teleported to the Library Historical Archive and search for the princess’ diary.
Once you get into the Archive, you’ll need to put your Thieving Skill to pickpocket an NPC named Istoria. This will net you the Bluish Key, which can be used on the purple display case to grab the princess’ diary for yourself. You then have to read the diary before returning to Martin to tell him there was nothing valuable in it. However, Martin will help you piece together a clue, after which you need to talk to him again to agree to split up.
You’ll be sent to the Forthos Ruins, where Martin will be for some reason. Make sure to bring your Axe and talk to Martin when you arrive to learn about the corruption plaguing the politics of the kingdom. After finishing the conversation, you need to travel into the ruins and search the four piles of stones to gather the digits for a combination. Take note of these somewhere, as they are random for every player, and you’ll need to track them yourself. Once you get the numbers, use your Axe to chop down the vines just south of where you talked to martin and go through the gap behind them. After you get through, you’ll find a panel you can enter the combination into to spell the princess’s name, Rose.
Putting in the combination correctly will reward you with another note you need to read before returning to Martin and talking to him. The two of you will then agree to meet at the following location, the Settlement Ruins on the southwest side of Wintertody Camp. You can find Martin inside one of the buildings, and after you talk to him, you’ll have to kill an Assassin. This fight is much easier than the other two in the quest, so you won’t have a problem as long as you are prepared.
Once you’re ready to start searching the ruins, cast fire spells at the chunks of ice until you find the Cold Key. You’ll then have to check the panel on the wall near Martin Holt, after which you’ll get another note. You know the drill by now, so read the note and check in with Martin to progress.
This will lead you to the Legless Faun pub in Port Piscarilius. Speak with martin there and climb the pillar to your west to get to the top floor. Go to the panel on the wall in the room and pay attention to what order the cities presented in a list are in. After you jot them down, climb down the wall and inspect the statues in the same order as the cities on the panel. Go up the pillar again and return to the panel to get another note.
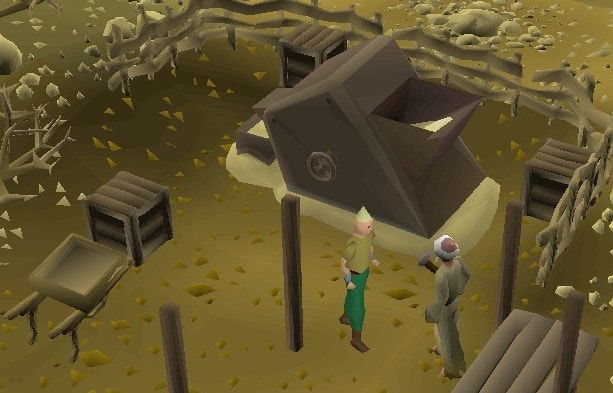
Getting the most recent note will trigger a cutscene where Martin is arrested. After it finishes, read the note yourself and go to Mount Karuulm, where you can find Rose in a small house to the south. Once you get there, search the bed to find a note, read it, and then search the crates in the corner before going down the trapdoor that this reveals to trigger another cutscene.
Xamphur the Mage
Items Required: Melee or Ranged equipment, Food, Antipoison
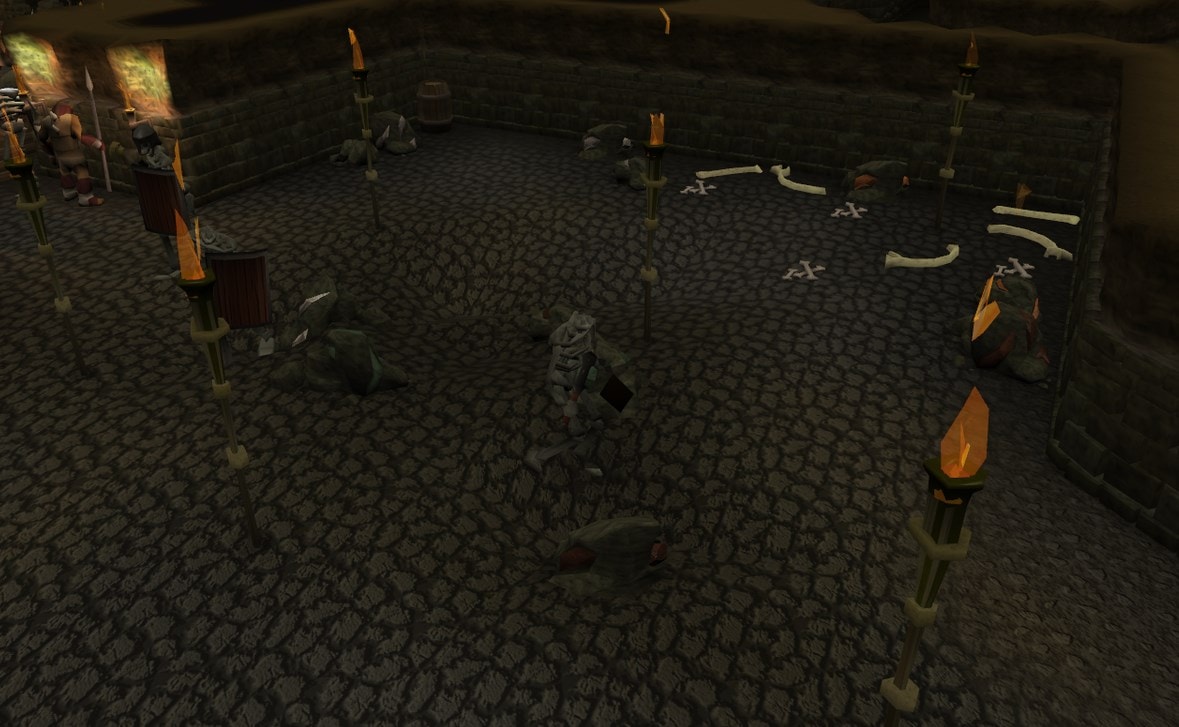
After you finish the above section, you’ll need to travel to the Lizardman Temple to face off against the mage Xamphur. When you first arrive at the temple, you’ll need to find the room with Kaht B’alam in it and talk to him. He says he’ll take you to the mage, but only after you retrieve his egg so that he can leave the kingdom’s war behind. To find the egg, head to the west and go across a bridge there. A Lizardman Brute’ll attack you that you should be able to make short work of after you search the piles of eggs there to find his egg.
Return to Kaht and give him his egg to receive the Damp Key item. You can use this key on the door in the northern part of the temple to get to a small room with a gate. Open the door to trigger a cutscene that will lead to the fight with Xamphur. If you can, activate the Protect from Magic prayer at the start of the battle, as he’ll attack with magic throughout the entire encounter. However, he is invulnerable to magic, so you’ll need to use ranged or melee equipment.
The fight also has some unique mechanics. For starters, avoid the Marks of Darkness on the floor, as walking into them afflicts you with a debuff. While the debuff is active, you will take additional damage from his attacks, which can be brutal. He will occasionally summon two Phantom Hand units, which you should focus on when they appear, as they have few hit points.
After Xamphur is defeated, he’ll regenerate his health and knock you unconscious. There will then be a cutscene; afterward, you need to go north to find a note. Read the message and then find Commander Fullore by returning to the tiny house with the crates hiding the secret trapdoor.
Houses of Kourend
Items Required: Melee Equipment, Lockpick, Molten Glass, Dark Essence Block (or Pickaxe and Chisel), Defence Potion, Volcanic Sulphur
Once you get back to the tiny house, you’ll need to interact with the crates again to enter the basement. Once inside, you’ll talk to Commander Fullore to discover that the current council ruling the kingdom was responsible for killing the previous king. To punish them, you are assigned to travel to the kingdom’s five cities to reveal this information to the five ruling houses of Kourend. You’ll then have to travel to each town and talk to the rulers to get them all to agree to meet at Xeric’s Lookout to discuss what to do.
After you get them all together, you’ll need to talk to Fullore to trigger another cutscene. After it finishes, you’ll need to explore the area and talk to each of the rulers of the houses to get their opinions. It is important to note that after you talk to Lady Lovakengj, you’ll have to speak to Commander Fullore immediately to ask for help. However, each leader has a task for you, which are detailed below.
- Lady Lovakengj: Wants to replace Councillor Orson with Councillor Unkar. After talking to her, talk to Fullore and then Martin Holt at Shayzien Prison. He’ll send you to a Royal Society meeting with a passcode to get in and talk to Martin’s contact. Head to the Graveyard of Heroes and talk to Jora to get into the meeting and kill the assassin that attacks you there. Continue talking to Jorra after you deal with the disturbance, read the Declaration you get, and then head back to Lady Lovakengj.
- Lord Hosidius: Hosidius will send you to investigate the Barbarian Camp south of the meeting place. Head there, and go down the ladder by its southern wall to talk to Phileas Rimor. You’ll get attacked by a Barbarian Warlord, so kill him and continue talking to Phileas. Then, return to Lord Hosidius and speak to him some more.
- Lord Shayzien: He will send you to the Vinery to retrieve a journal. Once at the Vinery, check out the wine barrel in the east, climb down the revealed avenue, and picklock the chest. This will get you a journal that you’ll have to return to Shayzien.
- Lord Piscarilius: If you need to get a Dark Essence Block, you can go to the Dense Essence Mine to get a block before embuing it at the Dark Altar. You’ll then need to talk to Piscarilius, travel to the Arceuus church, and go upstairs. Go up another set of stairs on the second floor and talk to the NPC named Mori. Give Mori the Dark Essence Block and Molten Glass to get a Dark Nullifier. Head to the Chasm of Fire, and you can climb down, and a cutscene will play.
- Lord Arceuus: Arceuus will task you with going to the Tasakaal near Mount Karuulm to get information about the Broken Redirector. When you get to Tasakaal, you can talk to anyone inside. You’ll then need to combine the Defence Potion and Volcanic Sulphur to make a Sulphur Potion. Have one of the people in Tasakaal to have them enchant it into a Shielding Potion and use it on the Doors of Dinh in Wintertodt Camp. Then go back and talk to Arceuus.
A New Age
Items Required: None
Once you’re done with the tasks for the leaders, you’ll have to talk to all of them one last time. Then, talk to Commander Fullore to trigger a new cutscene. Afterward, you’ll have to talk to Fullore some more before going down the nearby ladder to talk to Lord Hosidius. After Hosidius reveals some plot details talk to Fullore one more time, and you’ll start a long but final cutscene before having to talk to Fullore one last time.
FAQs
Question: Do you have to play other quests before A Kingdom Divided?
Answer: Yes, before starting the quest, you have to complete Client of Kourend, X Marks the Spot, The Depths of Despair, The Queen of Thieves, The Ascent of Arceuus, The Forsaken Tower, and Tale of the Righteous.
Question: Is the quest A Kingdom Divided only for members?
Answer: Yes, A Kingdom Divided and the entire Kourend quest line are only available to OSRS members.
Question: Do you get more spells for completing A Kingdom Divided?
Answer: Completing the quest will reward you with additional Arceuus spells.
Conclusion
A Kingdom Divided is a unique quest in OSRS because it concludes a long and exciting quest line in the MMO. The quest line is one of the few universal storylines for players to experience in the game with world-altering impacts, which is fun to see. This makes it one of the most worthwhile quests to complete for members. If you are at a high enough level to meet it and enjoy questing in OSRS, I highly recommend it.
Here are other interesting readings for you:
- Smoke Devil OSRS Guide [2022]: The Mutant Cousin Of Dust Devils
- Bone Voyage OSRS Guide
- Fossil Island OSRS Guide
- Kharedsts Memoirs Guide
- Plague City Guide
- Lost City Guide
This article was updated on 11/04/2022 by the Rune Fanatics editorial team. Our goal at Rune Fanatics is to provide the most up-to-date relevant quest information, walkthroughs, and tips. We updated some of the article text to give you better, more relevant information.
- Zulrah Guide - October 22, 2022
- Tempoross OSRS Guide - October 15, 2022
- Calisto OSRS Guide - October 15, 2022