

Raids are a longstanding feature of MMOs and tend to serve as endgame content that tests the most experienced players. They do a similar purpose in Runescape, although there is currently only one available in the game. However, that raid holds many unique rewards that many players will want to earn. So, if you’re looking for a complete guide on how to get started doing raids in Runescape, you’ve come to the right place.
Key Info Up Front
- Members Only: Yes
- Raids: Liberation of Mazcab
- Activity Size: Ten Players
- Matchmaking: Yes
Raids Overview
There are plenty of high-level activities for players to focus on in Runescape, but the game’s raiding activity is one of the most engaging and fun for combat-focused players. Currently, only one raid in Runescape is located on the Goebie world of Mazcab. The raid comprises smaller combat encounters that separate two more significant boss battles, each challenging players with unique mechanics and roles.
Raids in Runescape can support up to ten players at a time and have full matchmaking, so even if you’re playing alone, you can still partake in the activity. The raid also has a range of unique loot for players to grind for, and each player gets their drops from the raid’s two bosses when they die. However, players can only get drops from the bosses once every two days to prevent players from grinding them too heavily.
Liberation of Mazcab

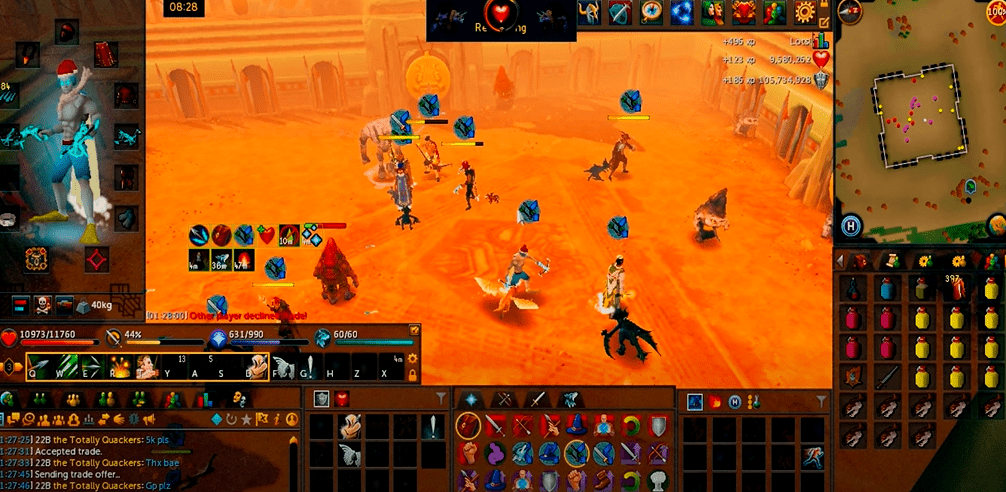
The Liberation of Mazcab raid is focused on the players fighting to cleanse a corrupted Goebie temple on Mazcab. The only way to reach the area is through the raid grouping system, and the raid is made up of two boss fights, a puzzle, and two more minor combat encounters. Once the raid starts, players have to drop down from the platform they spawn on to enter an area called Durzag’s arena. If you’re new to the raid, this is a great time to let the rest of your team know and ask any questions you have, or organize your group.
Once in Durzag’s arena, the fight won’t start until the raid group talks with the Goebie there and spawns a group of Goebie prisoners. The group must be protected from enemy creatures like Airuts, Cormes, and Chargers. Once the group has killed a total of 39 of them, they can progress and have to fight the raid’s first boss: Beastmaster Durzag. The boss fights in Liberation of Mazcab are the raid’s main attraction and are very complicated with different mechanics and player roles, so check below for a complete breakdown of the fight.
After slaying Beastmaster Durzag your group will have to search the cages in the outer area of the arena to reach the canals. This is the location of a second combat encounter and a puzzle your group will need to solve before moving on to the second boss. When you first reach this area, you will find a group of Jellyfish that need to be killed. This encounter is typically done by having the entire group attack one Jellyfish at a time to kill it as quickly as possible. Avoid using any abilities or spells that have an area of effect unless your group starts fighting multiple at once.
One of the Jellyfish will also have a reflection ability that can be very dangerous as it sends some damage back to its attackers. To circumvent this, have a member of your group use either dreadnips or the special attack of the Zamorakian spear to negate the effect. Otherwise, abilities like Soul Split that can disperse the damage through the entire group can also be helpful.
To cross the canal the group will need to split up and communicate. Four or so players will have to return to the start of the area to interact with a block and reveal a face. This face will correlate to a pad with four faces, and another player must step on the pad of the revealed face to progress. Once this simple puzzle is completed, the group will be able to continue and will reach the second boss, Yakamaru. Yakamaru is also a very complicated boss, so check the more detailed guide below for how to defeat it.
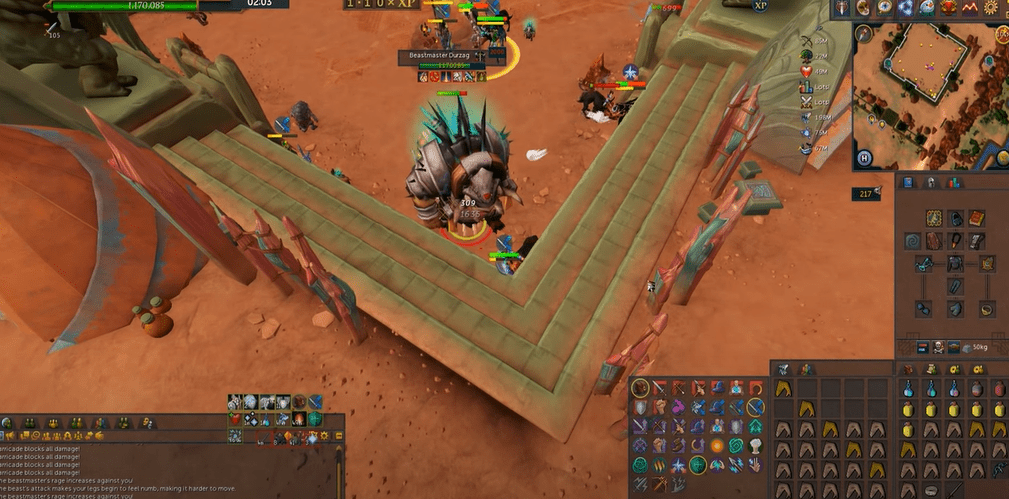
Beastmaster Durzag

One of the most essential parts of boss fights in raids is understanding that the group will split into different roles, each having its own responsibilities throughout the war. With that in mind, I’ll be going through each of the roles and breaking down their requirements and duties throughout the fight.
Ranged or Mage DPS
The DPS role is responsible for dealing with the majority of the group’s damage throughout the fight. So, to fulfill this role, you’ll need at least 90 in either Ranged or Magic. I also recommend bringing at least tier 80 armor and tier 85 weapons to ensure you contribute your fair share throughout the fight. Then, get some Overloads and Sharks to ensure you can stay on your feet and buff your damage and accuracy.
So, once Beastmaster Durzag and his first pet spawn into the arena, your first job as a DPS will be to attack the pet. To do this, you’ll want to stand at the center of the arena and focus your damage on it. However, you only want to get it to around 150,000 remaining hit points and not kill it. This is because killing it will cause Beastmaster Durzag to go into rage mode, so make sure to stop attacking the pet once it hits that threshold.
Once the pet is at that threshold, the second pet will have spawned, and you’ll need to move on to that pet while still staying close to the arena’s center with the other DPS players. You’ll take a similar approach with this pet and get it down to 150,000 hit points before moving on to attack Durzag. At this point, you’ll want to hit him with everything you can and bring his health down to 750,000. Reaching this point will put him into an invulnerability phase where your group will have to kill off the two pets first. Killing the pets should take only a few seconds since they’ll be so weak, and you can return to damaging Durzag.
During this phase, Durzag will throw out bombs that can kill the entire group if they aren’t defused. As a DPS, it is your responsibility to help defuse these whenever they are thrown by running over and clicking on them. Chargers will also attack you periodically during this phase, and if they ever get too piled up, don’t be afraid to turn your attention to them to thin them down before returning to attacking Durzag.
Pet Tank
Two members of the group fill the Pet Tank role. The first is referred to as Pet Tank 1/3, which means that they are designated to distract and soak up the damage of the Beastmaster’s first and third pets. The first pet spawns before Durzag and always comes out of the western cage. Stand near the cage and taunt him to keep his attention away from your other group members. His targeting will randomly switch periodically, so keep an eye on where he is facing so that you can taunt him again and make him look at you if he looks away. If he attacks a Goebie, however, you can let him do so and not worry until he starts looking at another one of your group members instead of you.
The third pet, however, has a randomized spawn location and appears around half a minute after Durzag and the second pet do. The most important part about tanking this pet is moving him away from Durzag, as their proximity to one another buffs the Beastmaster’s damage. So, you’ll want to bring him to a corner of the arena away from Durzag and keep his attention on you with taunts as you buff your shield and continue to damage him. However, be aware that it will randomly jump to other players, and you’ll need to run over and get its attention back on you whenever it does.
Even when it hits 150,000 hit points, you’ll need to stay attacking it so that it doesn’t turn its attention on others. This will also allow you to lower its hit points so that when the DPS does want to kill the pets, they can do so quickly. Once the pet is done, you can join the DPS players in attacking Beastmaster Durzag.
The Pet Tank 2 role is similar and simpler than Pet Tank 1/3. The second pet always spawns on the northern side of the arena when Beastmaster Durzag appears. So, wait there and get the pet’s attention immediately when it jumps into the arena. Then, help the DPS lower its health until it reaches 150,000 remaining, and then keep its attention on you until the group is ready to kill the pets off. Once your pet is dealt with, you can join the rest of the DPS players.
North Chargers
Your raid group will need two people to fulfill a North and Off-Tank role. If you take the North Charger role, go to the northeast corner of the arena just before Durzag spawns. The walls of the arena are filled with cages that Chargers will then spawn in. You’ll need to go around the arena toward the southwest corner, slowly unlocking each of the cells one by one. This will prevent all Chargers from being released at once and randomly attacking other group members.
Make sure to go counterclockwise around the arena slowly enough that the Chargers stay on you instead of going to another player. Once you meet the Off-Tank in the corner, you’ll be able to group all of the Chargers together and quickly kill them with an area of effect attacks. Once you’re done with the Chargers, you can join the regular DPS players.
Main Tank
The Main Tank is the most critical and difficult of all the roles in the raid. You’ll want to have at least three pieces of Achto or Tempest armor to decrease your cooldowns for tanking abilities. To play this role, you’ll also need a strong shield, plenty of healing consumables, and high Prayer to keep defensive prayers active throughout the fight.
So, when Durzag is ready to jump into the arena, you’ll want to wait in the Northeast corner where he jumps down. You then will need to taunt him so that he starts attacking you. Wait for the Chargers in the southeast corner to be moved away and then lead him into that corner to keep him away from his pets. You’ll then be staying there to keep him away from other players.
However, you’ll have to make sure to use prayers and cooldown abilities so that you can survive the constant damage. However, you’ll also have to keep an eye on the stacks his attacks give you. These can reach up to 15 at a time, and at every interval of five, your defensive stats will be reset to their base value. However, the stacks can be cleared using the freedom ability, so try to use it as frequently as possible. You’ll want to take your stacks into account when using defensive abilities, however, so that you don’t use them just before hitting an interval of five and losing all of your buffs.
Once Beastmaster Durzag’s hit points reach 750,000, he will become enraged. At this point, your group’s Off-Tank should pull him off you so that your stacks can reset. You’ll then need to pull him back off your Off-Tank so that their stacks can reset. For the remainder of the fight, you and the Off-Tank will pull Durzag off one another whenever your stacks are reset to avoid one of you being killed.
Off-Tank
The Off-Tank role acts effectively as a combination of the North Chargers and Main Tank roles. During the first part of the fight, you’ll want to gather all of the southern Chargers by starting in the southeast corner. Meet the North Charger in the southwest corner and then kill them together. Once that is done, you can help as an additional DPS on Durzag while standing by the southern gate.
Once Durzag hits only 750,000 hit points, you’ll need to taunt him off the Main Tank so that their stacks can reset. The Main Tank will then draw Durzag back off you once their stacks are reset, and you both will have to go back and forth doing so until Durzag is killed.
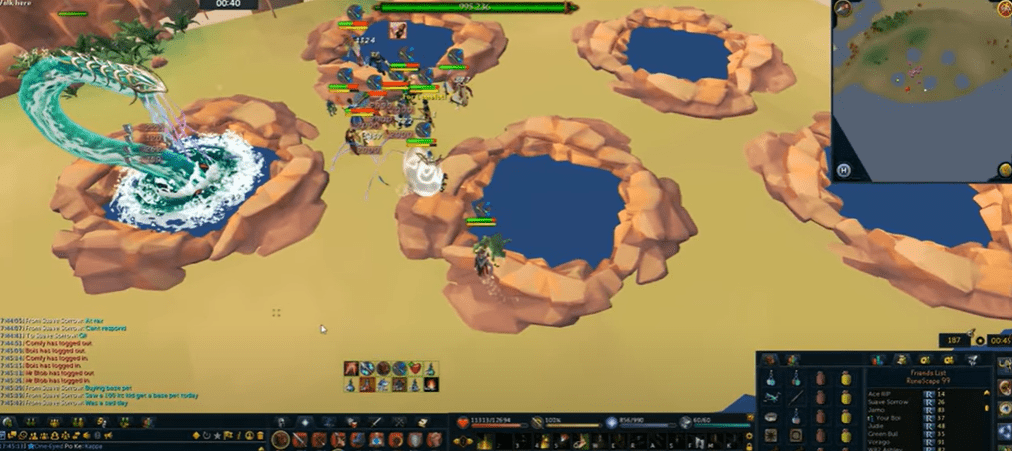
Yakamaru

The Yakamaru fight is the final stage of the raid and splits the group into various roles, similar to the Beastmaster Durzag fight above. However, there are some things that every role needs to be aware of. The first is the “blue debuff.” This debuff can be seen when your character starts glowing blue, which signals that you need to stand next to another player to pass it off to them. Otherwise, it will start repeatedly damaging you and can quickly kill you. Once it has been passed around enough times, it will disappear, so don’t worry about pushing off the damage to another group member.
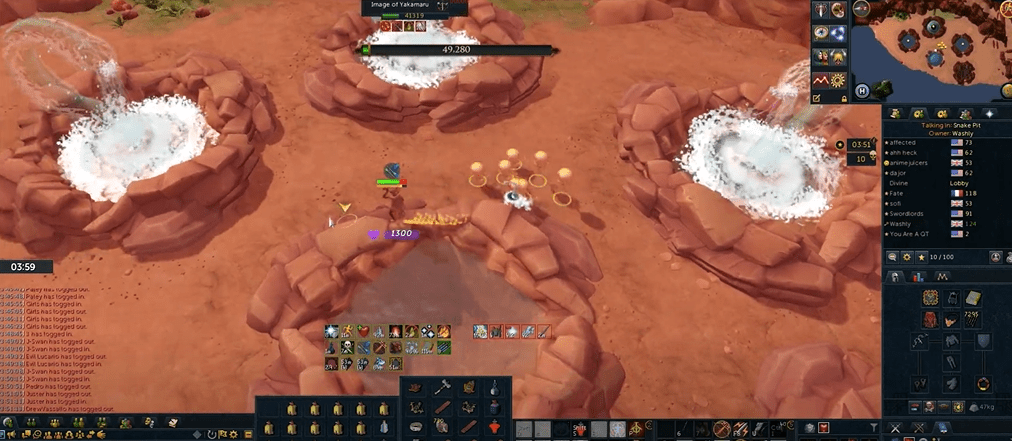
The second is healing through the jellyfish geysers. Throughout the fight, Jellyfish will spawn throughout the map and create geysers around them that look like holes in the ground. If you are close to one and need to heal, you can target the Jellyfish and use an ability to keep it in place so that it can’t melee attack you. Then, use the resonance ability and stand on a hole to get lifted by a geyser and healed. It is important, however, that you target the Jellyfish, otherwise, Yakamaru will hit you with an attack triggered by the resonance that will undo all the healing you receive.
Throughout the fight, Yakamaru will also jump around between four pools of water that each has its effects. So, make sure to read the details for each one below to know what you’re getting into.
Sand Pool

Location: Northwest
While Yakamaru is in the Sand Pool, eight of the ten players will become stuck in quicksand. If you aren’t one of the two sanded people, you need to go around and help free people. Once you are freed, you should also free people near you to get everyone free. You can still use combat abilities while you’re in the sand, but it will sink you further into the sand, and if you get pulled down you’re instantly killed.
Stun Pool
Location: Northeast
Stun Pool will likely go faster than the other three during your raid. While Yakamaru is in this pool, you cannot use any stun abilities, including asphyxiate, or it will damage everyone in the group. However, Yakamaru can only be damaged while stunned in the pool, so your group will need a designated stunner, the role description below. You’ll also want to save all of your abilities until after Yakamaru is stunned, as it will drastically release its defenses.
Tendril Pool
Location: Southeast
Tendril Pool is the easiest one in the raid. Unless you have a unique role to be concerned with, you must focus on dealing as much damage as you can and passing around the Blue Debuff when it appears. You may get picked up by a tendril during this pool, but if that happens, just keep your attention on dealing high amounts of damage and you’ll be placed back down once you cross a certain threshold.
Shark Pool
Location: Southwest
This pool is another straightforward one. Focus on dealing damage until a tornado appears around Yakamaru. When this happens, you’ll need to run away from the pool as it means that the boss will soon throw exploding sharks out around it. Wait for the sharks to explode and then you can go back in and continue attacking. The sharks can follow you if you don’t get away quickly enough, but if that happens, just left-click on it and you will kick it away from you and be safe.
Mirage
Once you’ve finished all four pools Yakamaru will return to the center pool and start a phase known as Mirage. Unless you are in a special role, you’ll need to make sure that you don’t attack Yakamaru and instead focus on the Jellyfish that spawn. Eventually, ghost versions of Yakamaru will appear in all four pools at once. You should first focus on attacking the one in Shark Pool and then Tendril Pool. As the mirage in Tendril Pool dies, you’ll have to go into melee range and fill a bubble that appears with sand by clicking on it. Then, go to the Sand Pool, kill it there, and then fill the pool with sand before killing the boss in the main pool one final time.
Poison Tank Role
One group member will also have to be the designated Poison Tank. If you take on this role, you will normally play throughout the above stages but have a special responsibility. Whenever the group fights Yakamaru, and he hits 100,000, he will spit out poison. Where the poison will hit is marked on the ground in green, and it is your job to stand in that spot until you get hit with it. You then will have to run into the melee range of Yakamaru so that when his hit points hit zero, he can bite you and take you out to shore, where you’ll be resuscitated. However, you will not have to do this during Stun Pool if you have a player filling the Double role below.
Double Role
The Double Role has a straightforward but important task. As long as your group does the Sand Pool before the Stun Pool, you will want one player to act as a Double. That player’s job is to stand in the poison with the Poison Tank player during the Sand Pool phase but do not go into melee range afterward. This allows them to go into melee rand during the Stun Pool phase since that phase is so fast that it can be challenging to make it into melee range in time after getting poisoned. For this role, you’ll need a lot of food and healing items as the poison will continuously damage you as you wait for the Stun Pool phase to start.
CPR Role

If you are fulfilling the CPR role, it is your job to bring the Poison Tank and Double back to life after they wash up on shore. To make this role as easy as possible, run to the shore once Yakamaru starts getting low on hit points in a pool. Then, when the player appears on shore, click on them to give them CPR and bring them back into the fight.
Stun Role
This player is responsible for stunning Yakamaru during the Stun Pool phase. You’ll want to use your stun ability when Yakamaru’s defenses get very high, meaning that he starts taking hardly any damage. You will likely have to do this twice during the phase. If your two stun abilities miss, however, your group should also designate a Backup Stun player to stun just in case.
North Tank Role
This role only comes into play during the Mirage phase. When the phase starts, you’ll need to go to the northwest corner and tank the Yakamaru in the Sand Pool there so that it doesn’t face the rest of the group. Make sure to not stand on the inner ring of the pool to avoid triggering the pool’s unique sand effect.
Stun5 Role

The Stun5 role is another role during the Mirage phase filled by two players. When the phase starts, you’ll need to pick up five of the planks Yakamaru throws out of the main pool. Once you have your five, just focus on helping kill Jellyfish until the mirages appear in the other pools. When the mirages appear, you need to head over to the Stun Pool and try to burn down the mirage there as fast as possible. Once the mirage is killed you can use your planks on the pool to cover it up.
Stun0 Role
This role is the same as the above Stun5 role, but you don’t take any planks and focus entirely on killing the mirage there as fast as possible.
Jelly Wrangler Role

This role activates during the Mirage phase. For this role, it is your responsibility to grab all of the Jellyfish that appear during the phase to keep them away from the other players. Then you just have to run around the arena and keep the Jellyfish distracted.
Shark10 Role
For this role, you’ll need to pick up ten planks at the start of the Mirage phase. Once the mirages appear, you’ll head over to the Shark Pool and tank the mirage there. Once the mirage is killed, you’ll need to click in the middle to cover it with plans and shut the pool down.
Rewards
Both of the bosses in the raid will drop multiple items when they are killed that are derived from a few different tables. There is always a slight chance that they will drop pieces of Achto equipment, a Mazcab Ability Codex, or Teci. Mazcab Ability Codices can be used to learn a handful of exclusive abilities, while Teci can be spent at the raid shop on various rewards. If they don’t, they’ll drop items according to the following tables.
Beastmaster Consummable Drops

| Item | Quantity Dropped | Rarity Rating |
| Cooked Eeligator | 5-8 | Common |
| Saradomin Brew (four doses) | ||
| Super Restore (four doses) |
Beastmaster Main Drops
| Item | Quantity Dropped | Rarity Rating |
| Black Dragonhide | 100-146 | Common |
| Magic Logs | 209-245 | |
| Rune Bar | 26-51 | |
| Rune Platebody | 15-46 | |
| Rune Spear | 20-79 | |
| Water Talisman | 72-89 | |
| Yew Logs | 314-896 | |
| Airut Bones | 72-146 | Uncommon |
| Ascendri Bolts | 25 | |
| Battlestaff | 104-139 | |
| Crystal Key | 13-30 | |
| Grimy Dwarf weed | 44-104 | |
| Grimy Lantadyme | 44-160 | |
| Hydrix Bolt Tips | 33 | |
| Runite Ore | 50-98 | |
| Raw Rocktail | 103-142 | |
| Raw Shark | 104-148 | |
| Sirenic Scale | 2-4 | |
| Uncut Dragonstone | 23-73 | |
| Razorback Gauntlets | 1 | Very Rare |
Beastmaster Tertiary Drops

| Item | Quantity Dropped | Rarity Rating |
| Small Goebie Burial Charm | 1 | Common |
| Goebie Burial Charm | Uncommon | |
| Durzag’s Helmet | Rare | |
| Lil’ Tuzzy Pet | Very Rare | |
| Ancient Effigy |
Yakamaru Consumable Drops
| Item | Quantity Dropped | Rarity Rating |
| Cooked Eeligator | 6-9 | Common |
| Saradomin Brew (four doses) | 7-10 | |
| Super Restore (four doses) | 7-10 |
Yakamaru Main Drops

| Item | Quantity Dropped | Rarity Rating |
| Airut Bones | 61-222 | Uncommon |
| Ascendri Bolts | 25 | |
| Battlestaff | 62-247 | |
| Black Dragonhide | 102-258 | |
| Crystal Key | 10-32 | |
| Grimy Dwarf weed | 42-102 | |
| Grimy Lantadyme | 43-60 | |
| Hydrix Bolt Tips | 30-65 | |
| Magic Logs | 210-689 | |
| Raw Rocktail | 109-300 | |
| Raw Shark | 114-150 | |
| Rune Bar | 25-54 | |
| Rune Platebody | 15-66 | |
| Rune Spear | 20-54 | |
| Runite Ore | 50-155 | |
| Sirenic Scale | 3-4 | |
| Uncut Dragonstone | 23-46 | |
| Water Talisman | 71-281 | |
| Yew Logs | 303-499 |
Yakamaru Tertiary Drops
| Item | Quantity Dropped | Rarity Rating |
| Small Goebie Burial Charm | 1 | Common |
| Goebie Burial Charm | Uncommon | |
| Large Goebie Burial Charm | Rare | |
| Yakamaru’s Helmet | ||
| Starved Ancient Effigy | Very Rare |
FAQs
Question: What combat level should you be for Liberation of Mazcab?
Answer: Most of the combat in the raid is ranged, so you should have at least level 90 Ranged or Magic as well as high Summoning and Prayer.
Question: Does Runescape have raids?
Answer: Yes, but it has only one available, Liberation of Mazcab.
Question: How many raids are in Old School Runescape?
Answer: Old School Runescape currently has two raids available: Chambers of Xeric and Theatre of Blood.
Conclusion
Attempting to complete Liberation of Mazcab can be very overwhelming for new players. Hopefully, this guide can help you enter into raids and have a lot of fun overcoming them with other players. If you are still nervous, some great groups in the community run learner raids specifically designed to help players learn how to complete the raid so that they can enjoy it to its fullest.
Looking for more interesting readings? Check out:
- Zulrah Guide - October 22, 2022
- Tempoross OSRS Guide - October 15, 2022
- Calisto OSRS Guide - October 15, 2022