

Smoking Kills is a part of the desert quest series and revolves around you trying to survive a plot made against you by Amascut, the goddess of destruction.
It takes place in the fifth age, so if you care about going through Runescape‘s quests chronologically, you’ll want to do this before moving on to sixth age content. So, here is everything you need to survive yet another of Amascut’s plans.
Key Info Up Front
- Member Only: Yes
- Official Difficulty: Intermediate
- Official Length: Short
- Prerequisite Quests: The Restless Ghost, Gertrude’s Cat, Stolen Hearts, Diamond in the Rough, Icthlarin’s Little Helper
- Skill Requirements: Slayer Level 35, Crafting Level 25
- Required Items: Combat Gear, Catspeak Amulet, Pet Cat, Ghostspeak Amulet, Earmuffs, Face Mask
- Quest Rewards: 1x Quest Point, 5,000 Slayer Experience, Pollnivneach Slayer Master, Pllnivneach Slayer Dungeon, 2x Treasure Hunter Keys, Full Slayer Point rewards
Smoking Kills Overview
The Desert quest line in Runescape is a fun one to go through, even though it doesn’t have the intense emotions or stakes found in some of the game’s most popular quests. Smoking Kills is a fun part of the quest line, as it includes some unique mechanics involving your pet cat, which is always fun to play around with.
Its Intermediate difficulty also means that it doesn’t have too many requirements and isn’t very challenging. Since its official length is also Short, you can easily play through it in one sitting once you have the necessary items gathered.
If you want to level your Slayer skill, this quest is also outstanding to do so that you receive as many Slayer Points as possible on assignments.
Required Stats
So, if you want to go through Smoking Kills, you first need to get your Slayer and Crafting levels to appropriate levels. You may already have these more than high enough, but if you don’t, I’ll cover the best way to reach the requirements so you can get there.
To do so, I’ll start at level one and work my way up, so you can jump in at whatever level you’re currently at and go from there.
Slayer Level 35
To level up your Slayer skill, you’ll have to accept missions from Slayer Masters. These missions will each give you a target to go and kill in exchange for rewards and skill experience. The first thing that you should know is which Slayer Master is best for you to go to. T
here is numerous spread throughout Gielinor, but you should try to use the one closest to your combat level to receive missions closest to your abilities, netting the most experience.
I recommend having a combat level of at least 60 for this quest, so if you are around there, you should go to Mazchna in Canifis if your combat level is at least 50 or Chaeldar in Zanaris if it’s at least 75.
Every four assignments you complete, you will be rewarded with Slayer Points that can then be spent on unique rewards. You should spend these as you earn them to ensure that you get as many rewards and benefits from your grinding as possible.
It is also important to note that Slayer is a skill without any optimized way to level it. So, go to the Slayer Master that is the closest to your combat abilities and complete missions until you reach Slayer Level 35 for the quest.
Crafting Level 25
To reach this requirement, there are three different methods that work well, so I will tell you about each of them to decide which works best for you. The first two can even carry you from Crafting Level 1 to 25, but the third is for anyone who wants to rocket from 20 to 25 as fast as possible.
The first is glassmaking. You can make Molten Glass at furnaces by combining a Bucket of Sand with Soda Ash. Soda Ash is gained by using Seaweed on a fire or cooking range.
Making Molten Glass will net you experience, and you can then use it to craft a range of items. While gathering the resources for this method can be time-consuming, it is a relatively passive method once you get going and will get you to Crafting Level 25 pretty quickly and with minimal effort.
The second method is for players that don’t have many resources to jumpstart their grinding. This method requires you to focus on making Urns or Jewelry.
This method takes a decent amount of time, but regardless of which you want to make you can get the Clay or Gold required on your own, letting you use this method even if you are completely broke.
The final method is unlocked once you reach Crafting Level 20 and will get you the last five levels you need for Smoking Kills quickly. This method requires you to cut gems. It is by far the fastest method of leveling Crafting, but it is also the most expensive as you’ll need so many gems that you will likely need to buy some.
If you use the second method above, however, you will likely get some gems from mining resources, so don’t forget to hold onto them and then cut them for the free boost to experience.
Items Required for Smoking Kills
If you don’t want any spoilers regarding the quest Smoking Kills you can wait to get the required items as they come up during the pursuit. I don’t recommend taking this approach, however, as it will make the quest take much longer and disrupts its pacing.
So, I recommend getting each of the items listed below before heading into the quest so that you are ready to complete each objective as it comes up.
Ranged Combat Gear
For this requirement, you can use either ranged gear like a bow with a quiver full of arrows or magic. There is a section of the quest where you will have to defeat skeletons that you can’t hit with melee, so make sure to bring whichever of the two options you are strongest in.
If you usually prefer one of those two methods for combat and don’t plan on using any melee, then you don’t have to worry about this requirement.
Catspeak Amulet
The Catspeak Amulet is a magical necklace that allows you to speak with any cat you come across. It’s a fun and novel item to have normally, but it is also used in numerous quests, so once you get one, make sure to hold onto it.
It is obtained by completing the quest Icthlarin’s Little Helper. If you lost yours for some reason, you can get another one by talking to the Sphinx found in Sophanem while you have a cat pet following you.
Pet Cat
For this quest, you’ll also need a pet cat. To get one, you have to complete the quest Gertrude’s Cat, after which she will give you a Kitten. You can then have the Kitten follow you around and feed it until it grows into a full-grown Cat.
If you have completed the Rat Catchers quest, you can also train it into a Wily or Lazy Cat, improving its combat stats. Your Cat can also be turned into a Hellcat by having it eat Hell-Rats during the Freeing Evil Dave section of Recipe for Disaster.
Any of these variants will work for Smoking Kills, so if you already have one, you don’t have to put extra effort into getting a different version if you don’t want to. If you had a Cat, but no longer do you can purchase a new Kitten from Gertrude for 100 coins.
Ghostspeak Amulet
Similarly to the Catspeak Amulet, this amulet allows you to see and speak with ghosts. It is one of the most iconic pieces of gear in all of Runescape‘s history because it is obtained from completing an early game quest called The Restless Ghost.
So, if you haven’t finished it you’ll have to do so, but it is a straightforward and quick quest that started at the cemetery in Lumbridge.
If you’ve completed the quest but no longer have the amulet for some reason, you can talk to Father Urhney in the Lumbridge Chapel to receive a replacement for free. It is also worth noting that if you’ve finished all of the hard-rated Morytania achievements, you won’t need this amulet to talk to ghosts.
Earmuffs
Earmuffs are a piece of Slayer equipment that requires Slayer Level 15 to be worn. You’ll need to use them on some Slayer Missions to kill Banshees, as without them, their high-pitched scream will be debilitating. They can be bought from Slayer Equipment sellers like the one in Burthorpe for 200 coins.
Face Mask
The Face Mask is another piece of Slayer equipment, but this one only requires a level of ten to be worn. Wearing the Face Mask will allow you to avoid taking damage from hazardous smoke or other air-based attacks such as the one found in the Smoke Dungeon in Kharidian Desert. It can be purchased from any Slayer Master for 200 coins.
Smoking Kills Walkthrough
Getting Started
Required Items: Catspeak Amulet
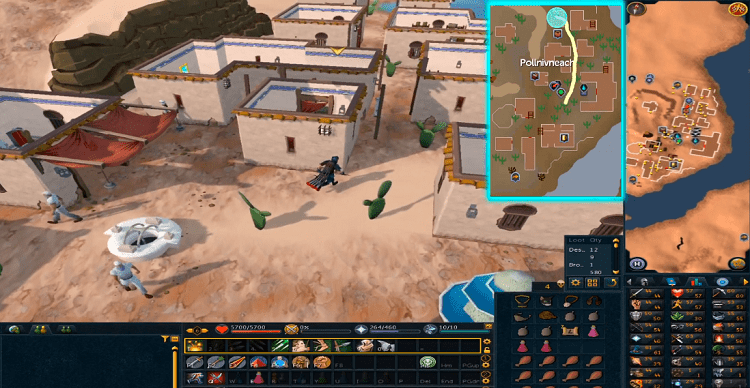
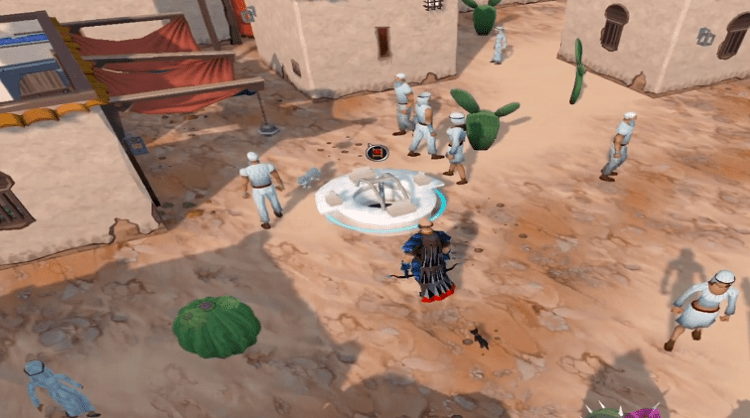
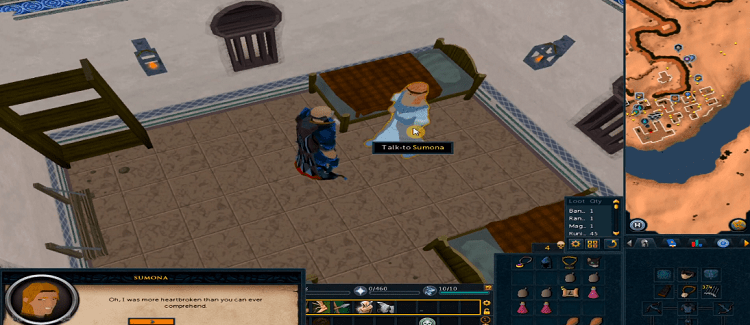
Once you have your Crafting and Slayer levels high enough and, have gathered the above items, you’ll finally be ready to start Smoking Kills. To do so, travel to Pollnivneach and head to the house by the quest symbol on the map. Inside the home you’ll find Sumona, who you’ll have to talk to to start.
She will inform you that she has a twin sister named Jesmona that is being held captive by a monster in the well at the center of Pollnivneach. Tell her that you’re willing to help and equip your Catspeak Amulet.
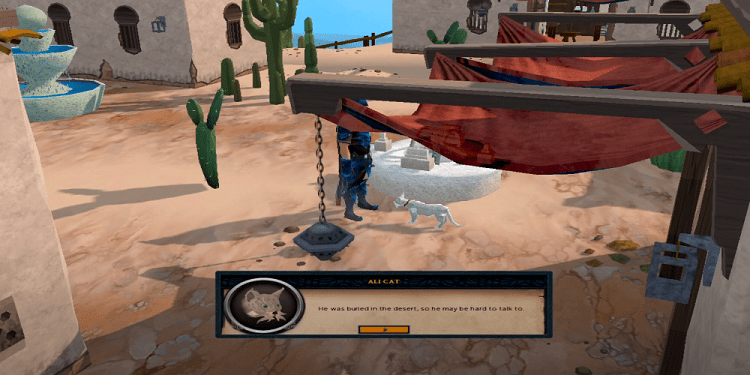
Once you have it equipped, head to the well and try to head down it. Doing so with the Catspeak Amulet equipped will trigger a cutscene in which a cat named Ali Cat talks to you.
During the conversation, it will tell you that if you survive in the well you need both the Earmuffs and the Face Mask equipped simultaneously, which is impossible because you only have one headgear slot.
Luckily, Ali Cat then tells you of a dead Slayer Master whose ghost remains that can teach you how to combine them into one piece of gear. The master’s name is Catolax, and he is buried in the ruins of Ullek.
The Journey to Catolax
Required Items: Amulet of Ghostspeak, Amulet of Catspeak, Pet Cat
To make your journey as straightforward as possible, head to the Agility Pyramid in the desert whichever way you prefer. Then, head southeast until you hit the sea, and you’ll find a swamp nearby. You’ll then have to head to the northwest corner of the swamp, which is a long journey, so bring a waterskin with you.
During the trip you may also be attacked by Locusts, Crocodiles, and even Scabarites. You can fight them if you want or activate the Protect from Melee prayer and just run past them to make a shorter time.
Once you reach the northwest corner, you’ll find a pillar you can climb, followed by some stairs you have to head up. You’ll come across a water source accompanied by two Archaeologists on the top of a plateau.
Head to the north to find a passage you can go through but beware of the Skeletons and Dried Zombie nearby as they are both around Combat Level 70. As you traverse the path, keep an eye out for a sealed door to the west, which you must enter to reach the dungeon for this quest.
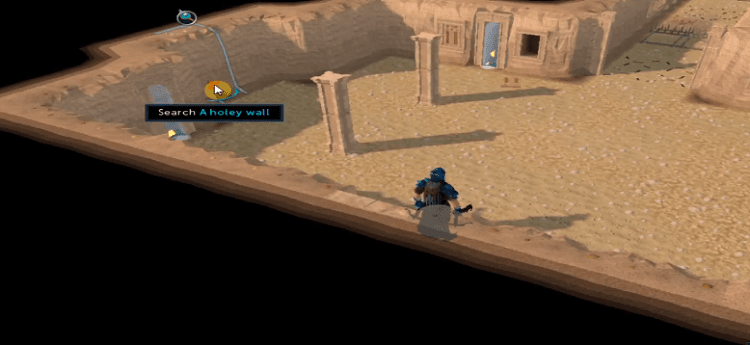
This will take you to the Tomb of Catolax. Once you get inside, talk to your Cat before proceeding any further. Then, search the Holey Wall on either side of you to discover that each one has two low level skeletons behind it.
One has rangers, and the other mages, so turn off auto-retaliate and go into whichever one your armor is better equipped for. Once you enter the room, don’t attack them; instead, go to the door nearby and break it down using the pickaxe on your tool belt. Go through the door and then pause because there are traps ahead.
Before continuing forward, keep an eye on the walls to look out for a small rectangular switch. These indicate a trap that will deal 1,300 damage with a single hit, but you can temporarily disable them by searching the wall.
So when you see one search the wall, check the chatbox for the message “With a subtle grinding sound, a hidden mechanism operates just ahead of you,” and then run past it.
You only have to do this twice, and once you get past the traps, you’ll come across a door you can open and walk through. In the room, you’ll find a handful of zombies and skeletons, but they aren’t a real threat, so quickly dispatch them however is easiest for you.
After a short pause, a Mummy Warrior with a Combat Level of 77 will appear. Use protective prayers, and it doesn’t take much special attention or mechanics as long as you have a Combat Level of at least 60.
After you kill the Mummy Warrior, you need to pick up a key that drops, which can either be a Magic Path Key or a Ranged Path Key. This depends on which room you originally entered at the start of the tomb.
Use the key on the unopened door in the room and pull the lever that you find behind it. Then head back to the beginning fo the dungeon. An important note is that you don’t have to worry about any traps or enemies this time.
Head back to the start of the tomb and go through the Holey Wall that you didn’t go into before. Proceed through it exactly as you did in the first half. Don’t forget about the traps!
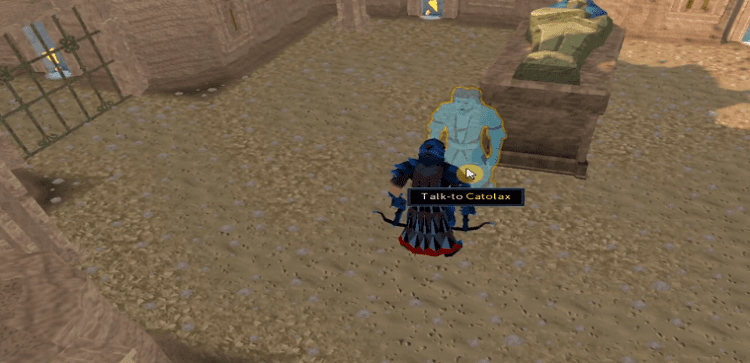
Once you reach the end, however, instead of finding a Mummy Warrior, you’ll find Catolax. Equip your Ghostspeak Amulet to talk to him, and you’ll be able to combine your Face Mask and Earmuffs.
The Well
Required Items: Masked Earmuffs, Ranged/Magic Combat Gear
With that, you’re ready to head back to Pollnivneach and venture into the well. Make sure to stop at a bank along the way and get any gear you think you might need for combat, including your Ranged or Magic equipment and some food.
Also, remember to equip the Masked Earmuffs before entering the well. Going in will transport you to the Pollnivneach Slayer Dungeon.
Once inside, travel north and kill the Mighty Banshee there. It should drop a Banshee Voice, but if it doesn’t farm the Mighty Banshee for a bit. It isn’t a rare drop, so you shouldn’t have to kill it too many times.
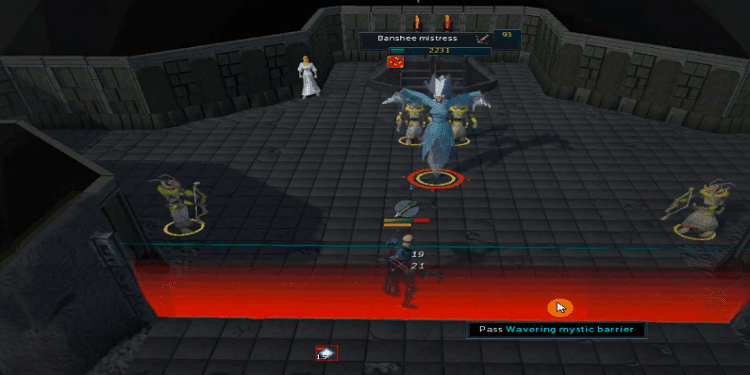
Once you get the Banshee Voice to continue north and use it on the magical barrier there to pass through it. This will trigger a cutscene, but while it plays, don’t click or input any commands; otherwise you’ll be dumped back outside the barrier and have to get another Banshee Voice to progress.
Immediately when the cutscene is finished, you will be attacked by a Banshee Mistress. She has a Combat Level of 94, so you may need to eat food and use protection prayers if you have them. However, she is very weak to Bolts, so if you have trouble killing her, bring a Crossbow or combat familiar to make things a bit easier on yourself.
Once she reaches half health, she calls on nearby Insectoid Assassins to fight alongside her. These will attack you with ranged attacks, so put on the Protect from Missiles prayer when she says the voice line, “Minions, aid me!”
If you are dealing solid damage to the Banshee Mistress, you can focus on killing her, or you can go and kill them first before returning to her to avoid taking unnecessary damage.
After you kill the Banshee Mistress, a cutscene will play showing Jesmona teleporting away from the dungeon. Make sure not to click anything here, as it will again teleport you outside the barrier, and you’ll have to run back to restart the cutscene.
Once it is done, you’ll be spoken to by Catolax again regardless of whether or not you have your Ghostpeak Amulet on. Then all you have to do is return to Sumona and talk to her.
Smoking Kills Quest Rewards
Completing the Smoking Kills quest is a must if you want to train your Slayer skill seriously. Many of its rewards are related to the Slayer skill alongside granting you one Quest Point and two Treasure Hunter Keys.
First, you’ll get a 5,000 Slayer experience which can help give you a bit of a boost. You’ll also gain access to a new Slayer Master in Pollnivneach that gives out missions once you reach Slayer Level 35 and Combat Level 90.
You’ll also gain access to the Pollnivneach Slayer Dungeon and the Tomb of Catolax dungeon, that you can repeat when you wish. Your Masked Earmuffs will also stay with you, which is a great way to help you not worry about switching back and forth between them while taking on Slayer Missions.
The biggest reward, however, is the increase in the Slayer Points you receive for completing missions. This boost will give you even more tips for grinding and is a must-have for any player looking to level up their Slayer to the highest tiers.
FAQs
Question: How Do You Get Masked Earmuffs in Runescape?
Answer: Masked Earmuffs are made by combining Earmuffs, and a Face Mask, which can only be done after completing the Smoking Kills quest.
Question: How Do You Turn off Auto Retaliate in RS3?
Answer: To turn off auto retaliate, you must navigate to the action bar and click on the sword icon. If it shows two crossed swords, that means that auto retaliate is on, while a single sword means it is off.
Question: What Quests are Required to Start Smoking Kills?
Answer: Before playing Smoking Kills, you have to finish the quests Gertrude’s Cat, The Restless Ghost, Diamond in the Rough, Icthlarin’s Little Helper, and Stolen Hearts.
Conclusion
Smoking Kills is far from the most complicated or intricate quest in Runescape, but it is still a fun one that has some great rewards for its completion.
So, whether you want to complete the Desert quest line or dream of becoming a Slayer master, you’ll want to run through Smoking Kills yourself. Once you’re done with it, you can even tackle the Do No Evil quest to continue the storyline.
Looking for more interesting readings? Check out:
- Masterwork Armor RS3 Guide
- A Crowning Achievement: Curse Of The Black Stone RS3 Guide
- Violet Is Blue RS3 Guide
- Zulrah Guide - October 22, 2022
- Tempoross OSRS Guide - October 15, 2022
- Calisto OSRS Guide - October 15, 2022